Effective Neovim setup for web development towards 2024

Hey, what's up? It's Takuya here. It's been a year since I last posted a video about my Neovim setup. The community plugins have evolved significantly during this time. The pace of evolution is so rapid and I have found it somewhat challenging to keep my configuration updated while also focusing on developing my app.
For example, LspSaga is one of the great plugins, but it often makes breaking changes, and there is a lack of information available for updating. I didn't want to spend much time resolving these minor issues. As a result, I decided to rely on one of the Neovim setups, which is called LazyVim.
Why I chose LazyVim is that I am a big fan of Folke's work. So, my config is hugely inspired by his dotfiles, although with some customizations to suit my preferences.
In this article, I'll share how to configure a modern Neovim setup from scratch, while explaining how to use each plugin. In addition to the setup, I'd like to introduce yet another theme that I created, which is based on Solarized Dark and Folke's Tokyo Night. Let me explain why I made it.
Ethan Schoonover originally created the Solarized color scheme in 2011, featuring a set of 16 colors. It's been my favorite color schemes. However, this assortment of colors falls short in providing adequate variations for additional signs, alerts, tooltips, and various other UI components made available by recent Neovim plugins. Furthermore, the text colors in the original theme are somewhat too dark when displayed on modern, vibrant monitors.
So, I decided to create my own one, which is called Solarized Osaka. Solarized Osaka improves upon this by introducing additional colors, enriching the overall theme to ensure compatibility with newer plugins and enhancing visibility on contemporary monitors. The theme brightens the base colors slightly, creating a visually appealing and functional color palette.
You can get my setup on GitHub here:
 craftzdog
Okay, let's start setting up Neovim!
Set up LazyVim
LazyVimMake a backup of your current Neovim files:
mv ~/.config/nvim ~/.config/nvim.bak
mv ~/.local/share/nvim ~/.local/share/nvim.bak
You get a bare nvim:

Install optional tools
brew install ripgrep fd
Clone the starter
git clone https://github.com/LazyVim/starter ~/.config/nvim
cd nvim
Remove the .git folder, so you can add it to your own repo later
rm -rf .git
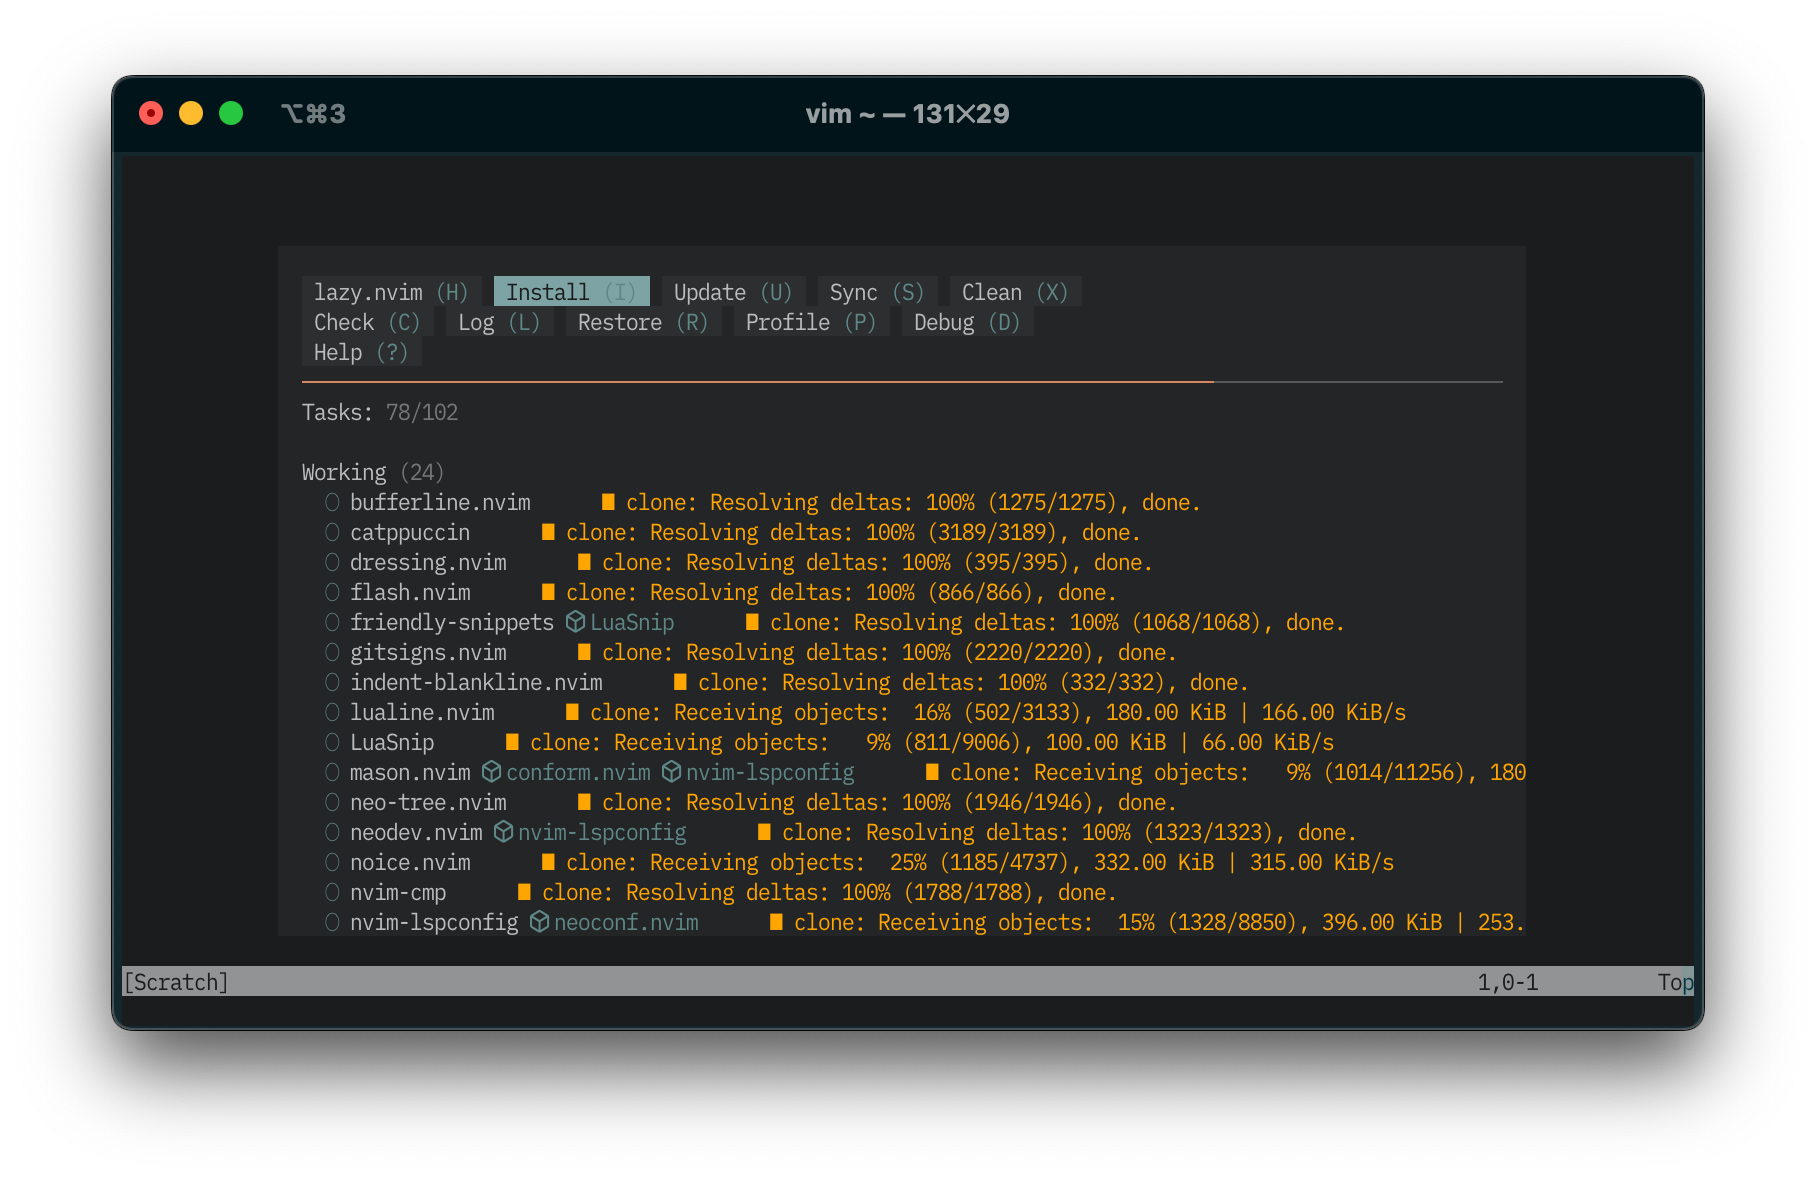
Start Neovim!
nvim
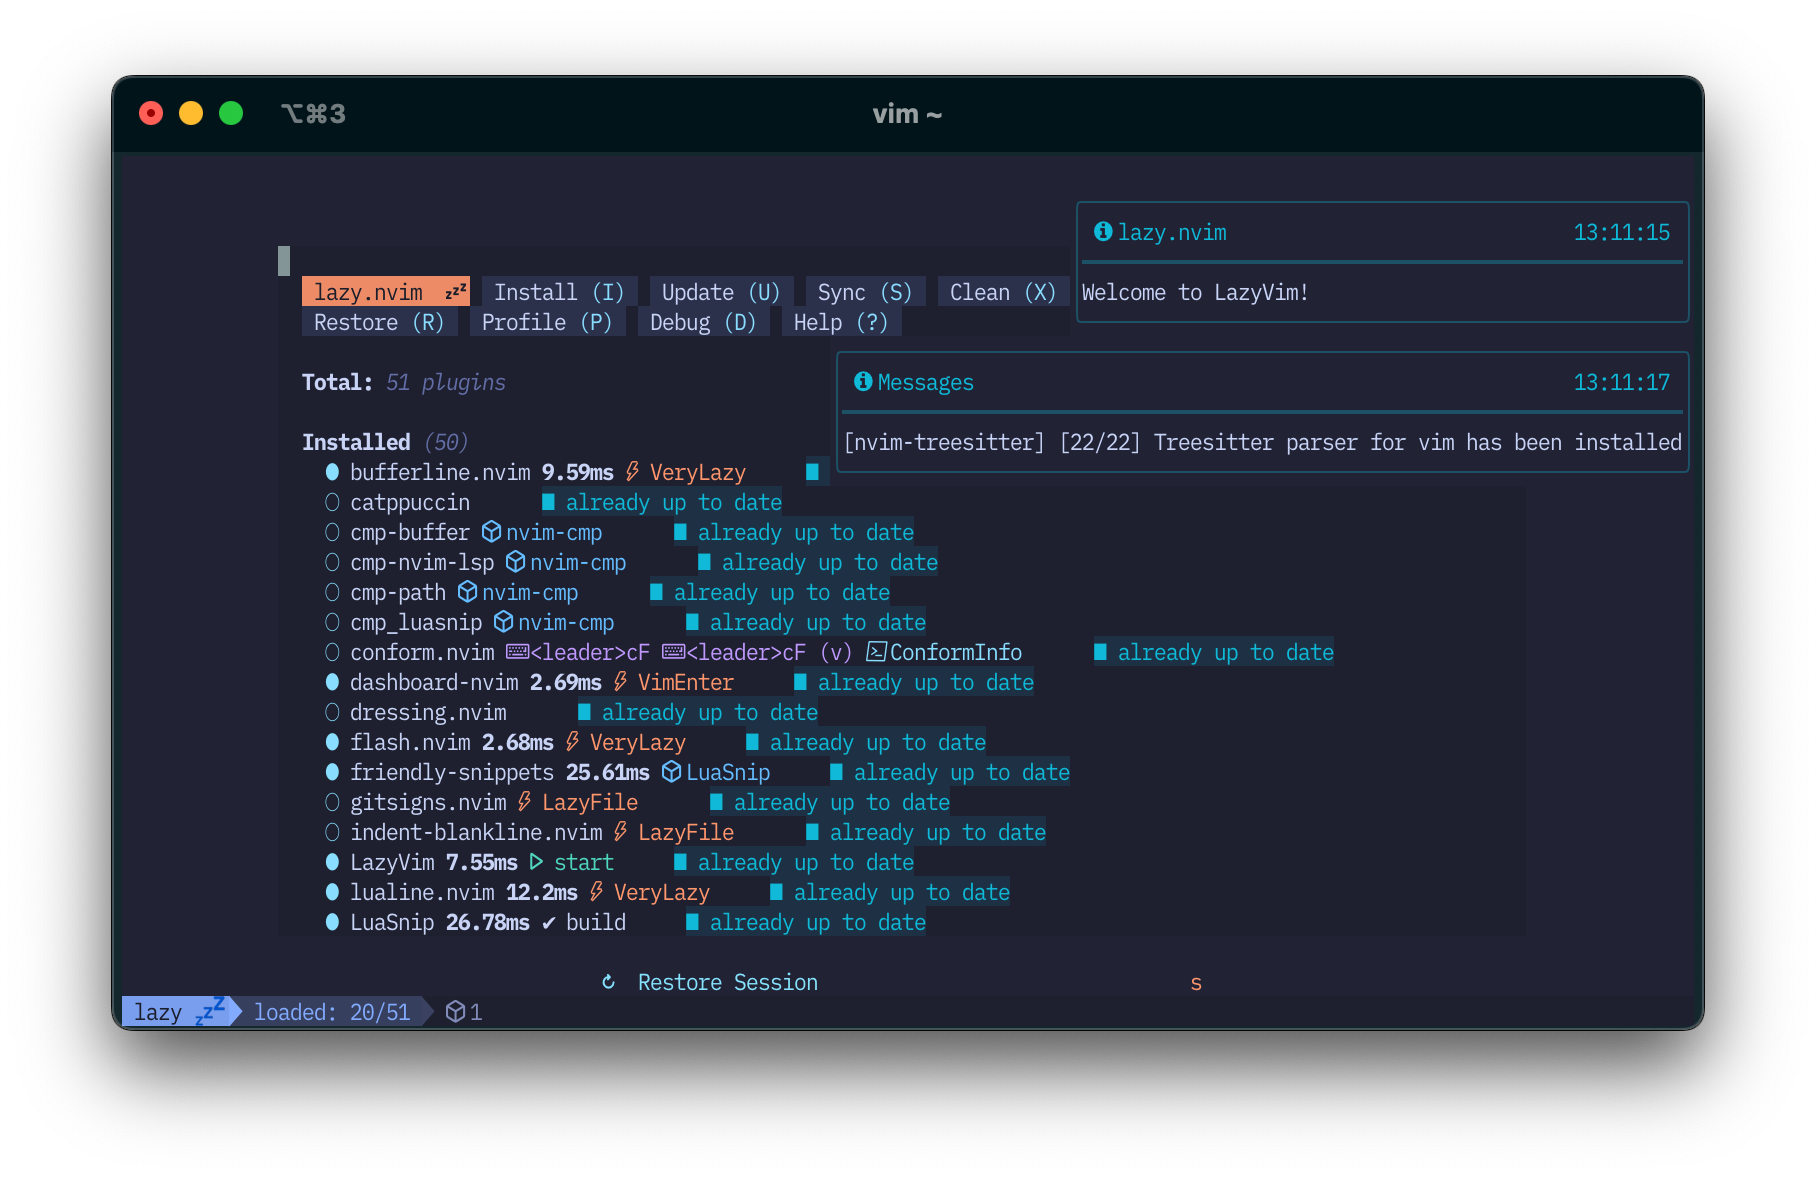
It automatically starts installing plugins:
The Tokyo Night theme is applied after the installation:
Why LazyVim?
First, I checked out Folke's dotfiles and discovered that he uses LazyVim. I then tried it and loved it.
I chose LazyVim over other community setups because it allows for flexible addition and disabling of plugins in your config folder. Naturally, you can also change the theme. I plan to change it to my theme later on.
You can quickly check for updates and easily keep LazyVim and plugins up-to-date. Press Space L and U to update the plugins.
It comes pre-installed with popular plugins maintained by the community. Relying on them saves you time that might be spent fixing broken configs.
My workflow differs from his, so I plan to make some tweaks specifically for coding Electron, React Native, and web apps.
Open an example project
cd ~/Developments/tutorials/
git clone https://github.com/craftzdog/craftzdog-homepage.git
cd craftzdog-homepage
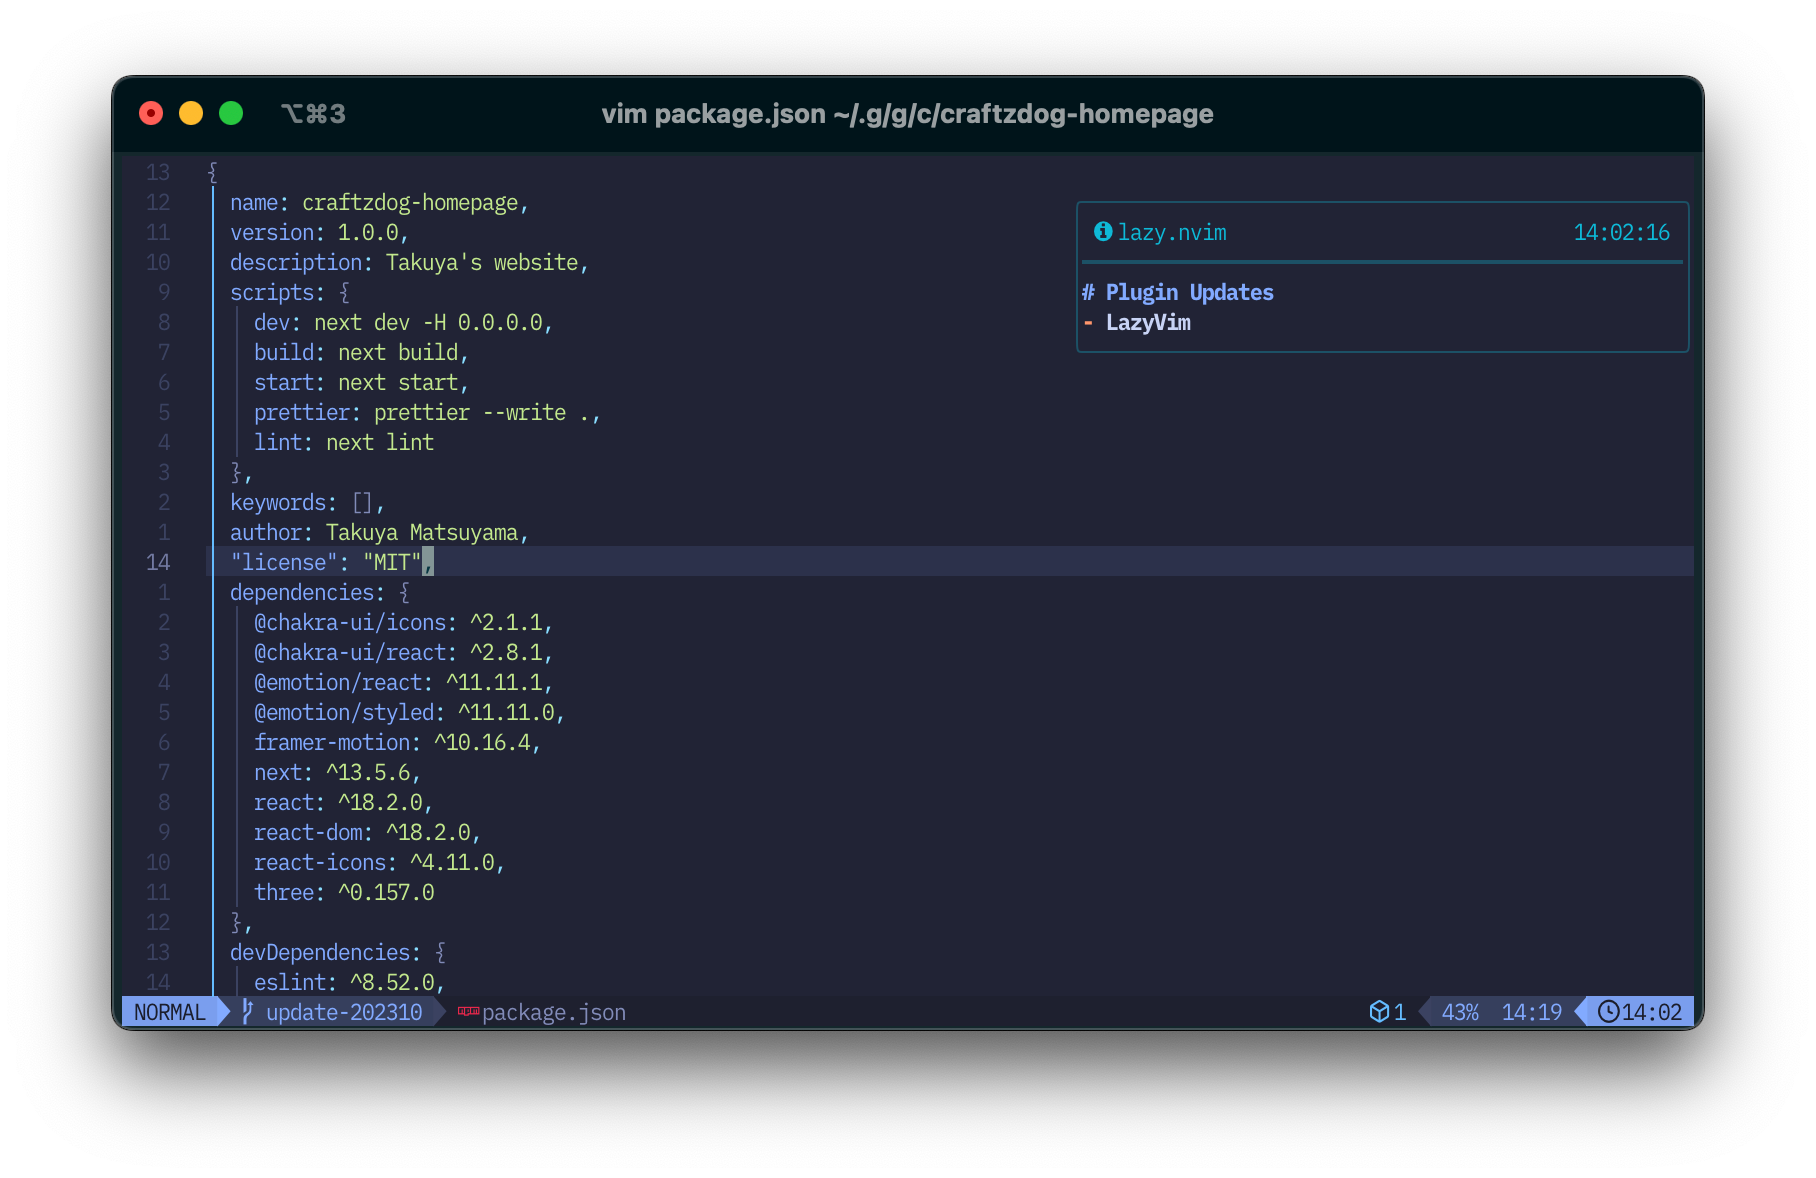
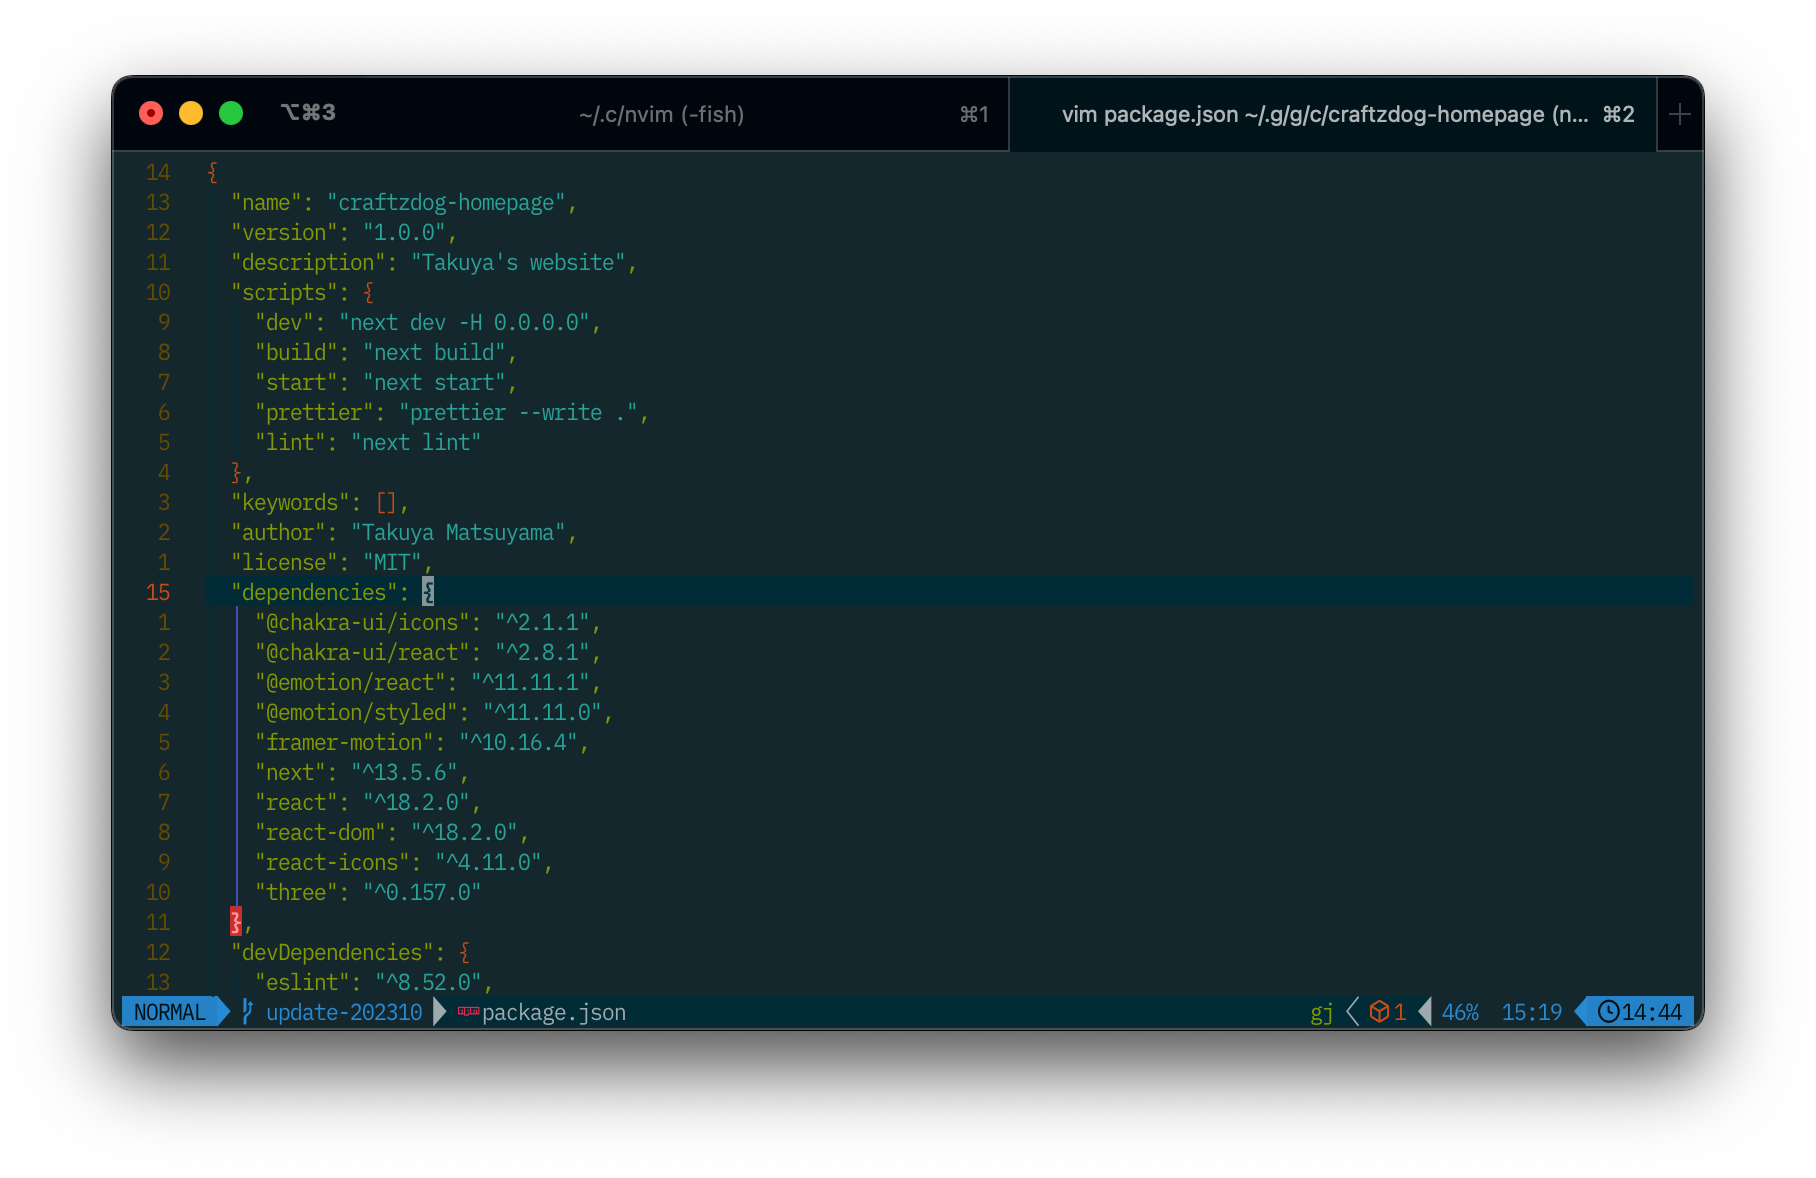
vim package.json
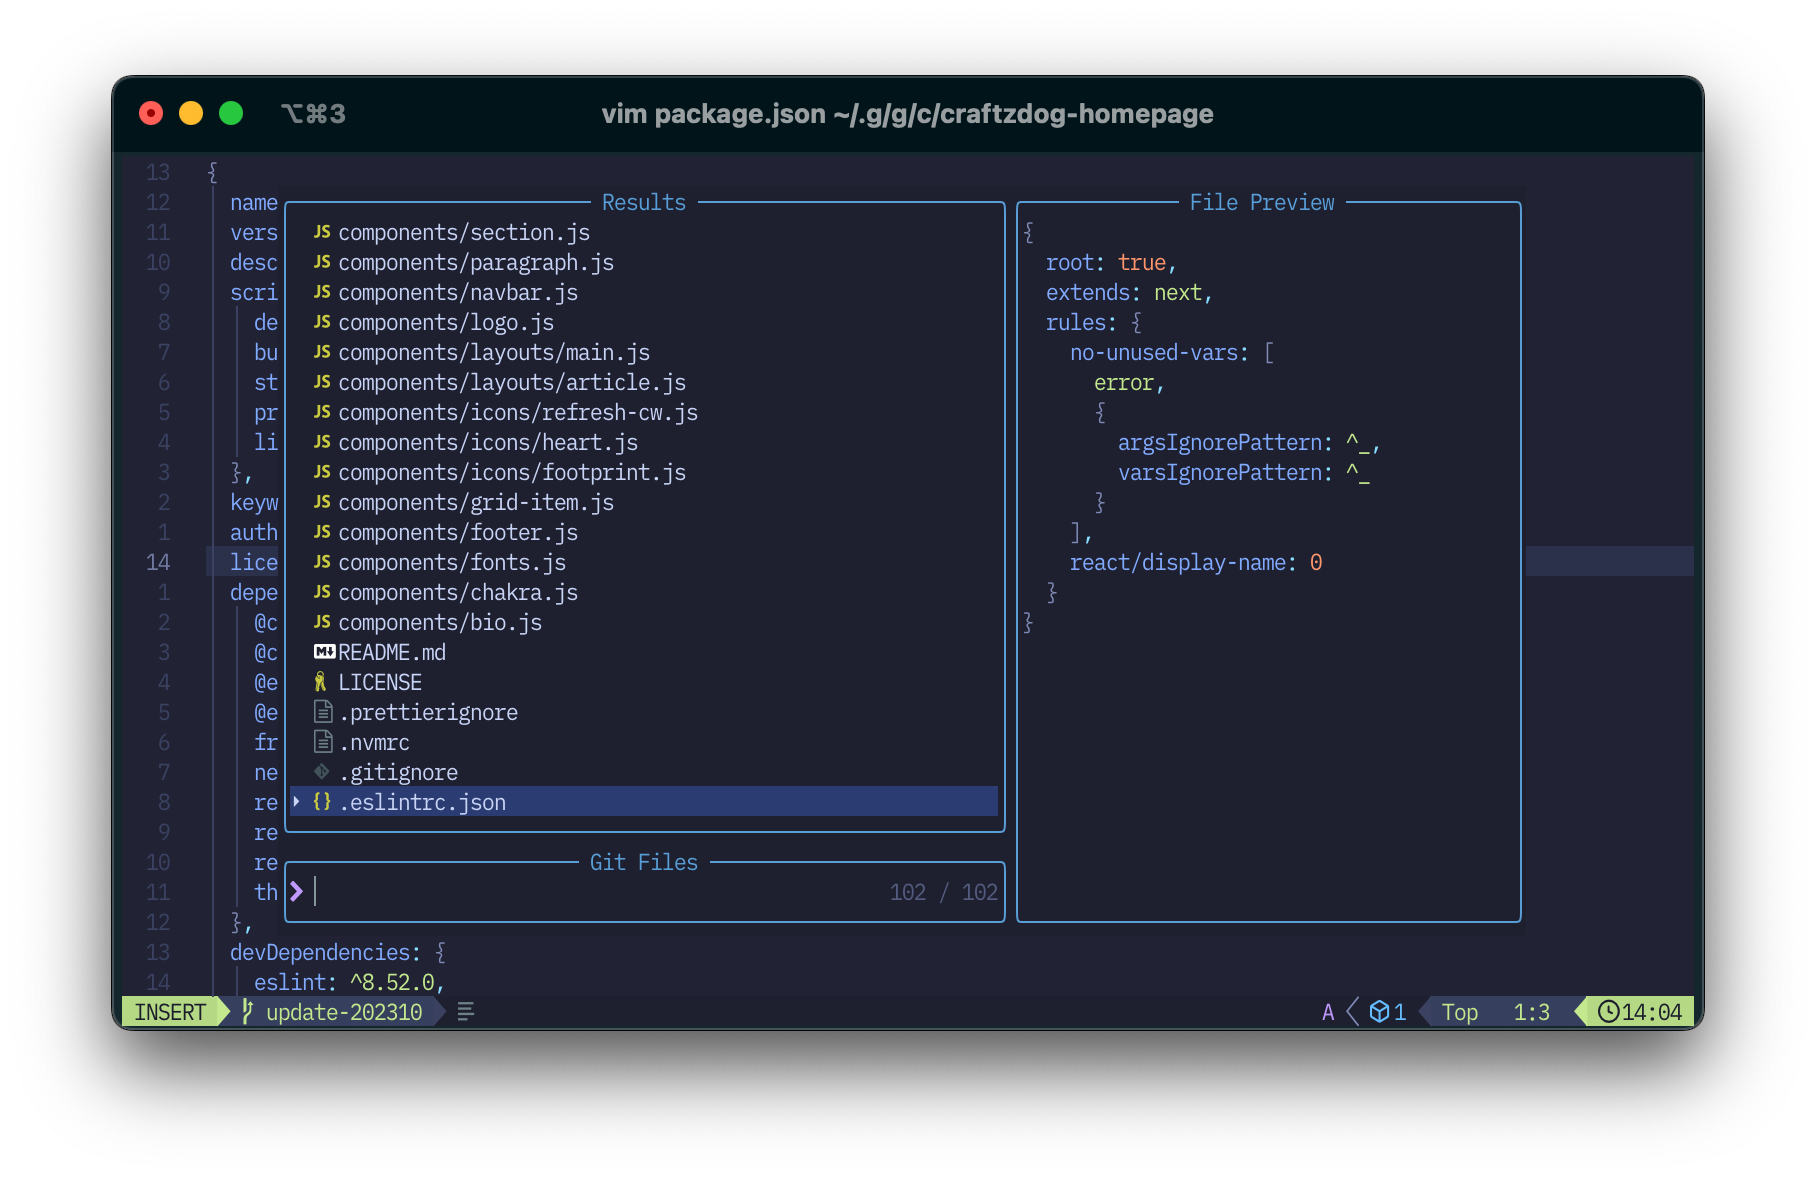
Press Space f f to launch telescope to search files.
Well, you can start coding already.
But I'd like to make some customization for my preferences.
Let's go back to the config directory.
cd ~/.config/nvim
Theme - Solarized Osaka
Let's change the theme to my own one: Solarized Osaka!
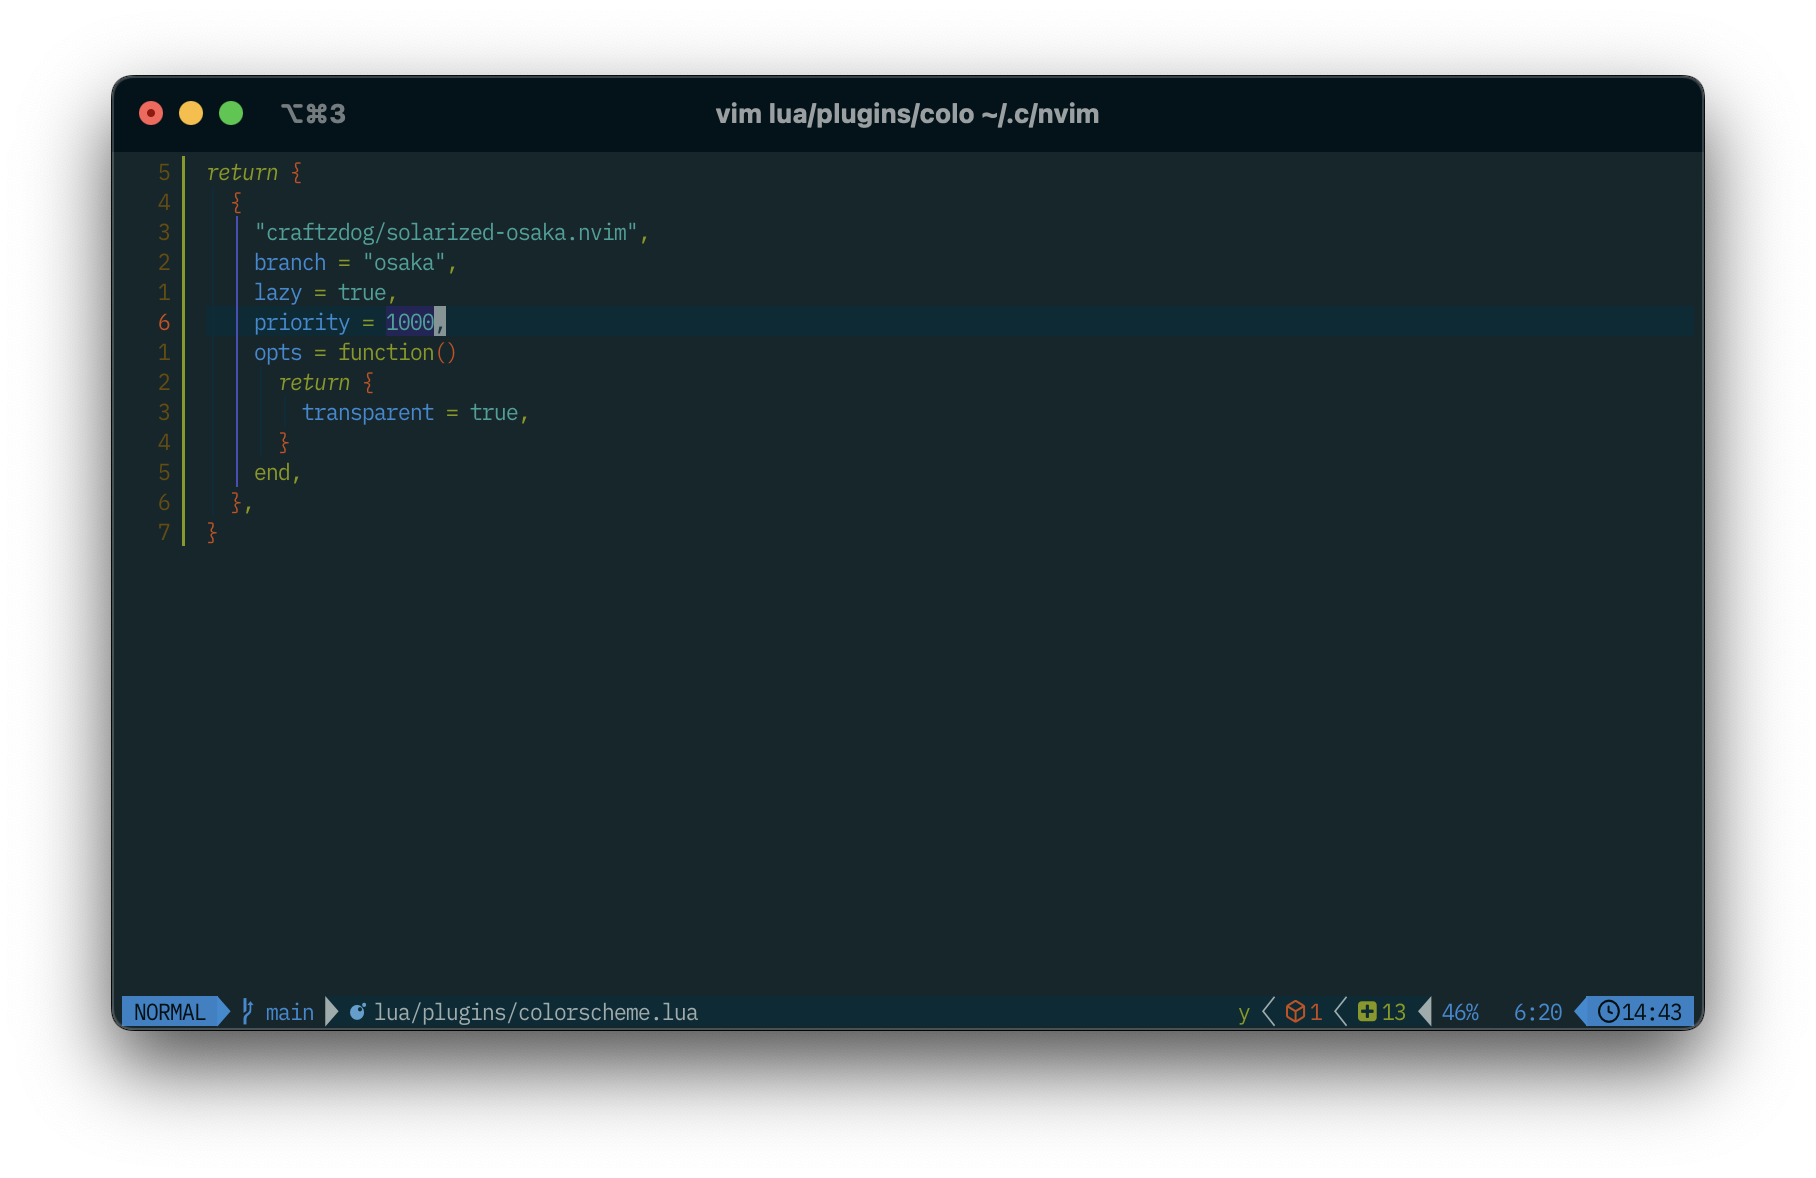
Create lua/plugins/colorscheme.lua
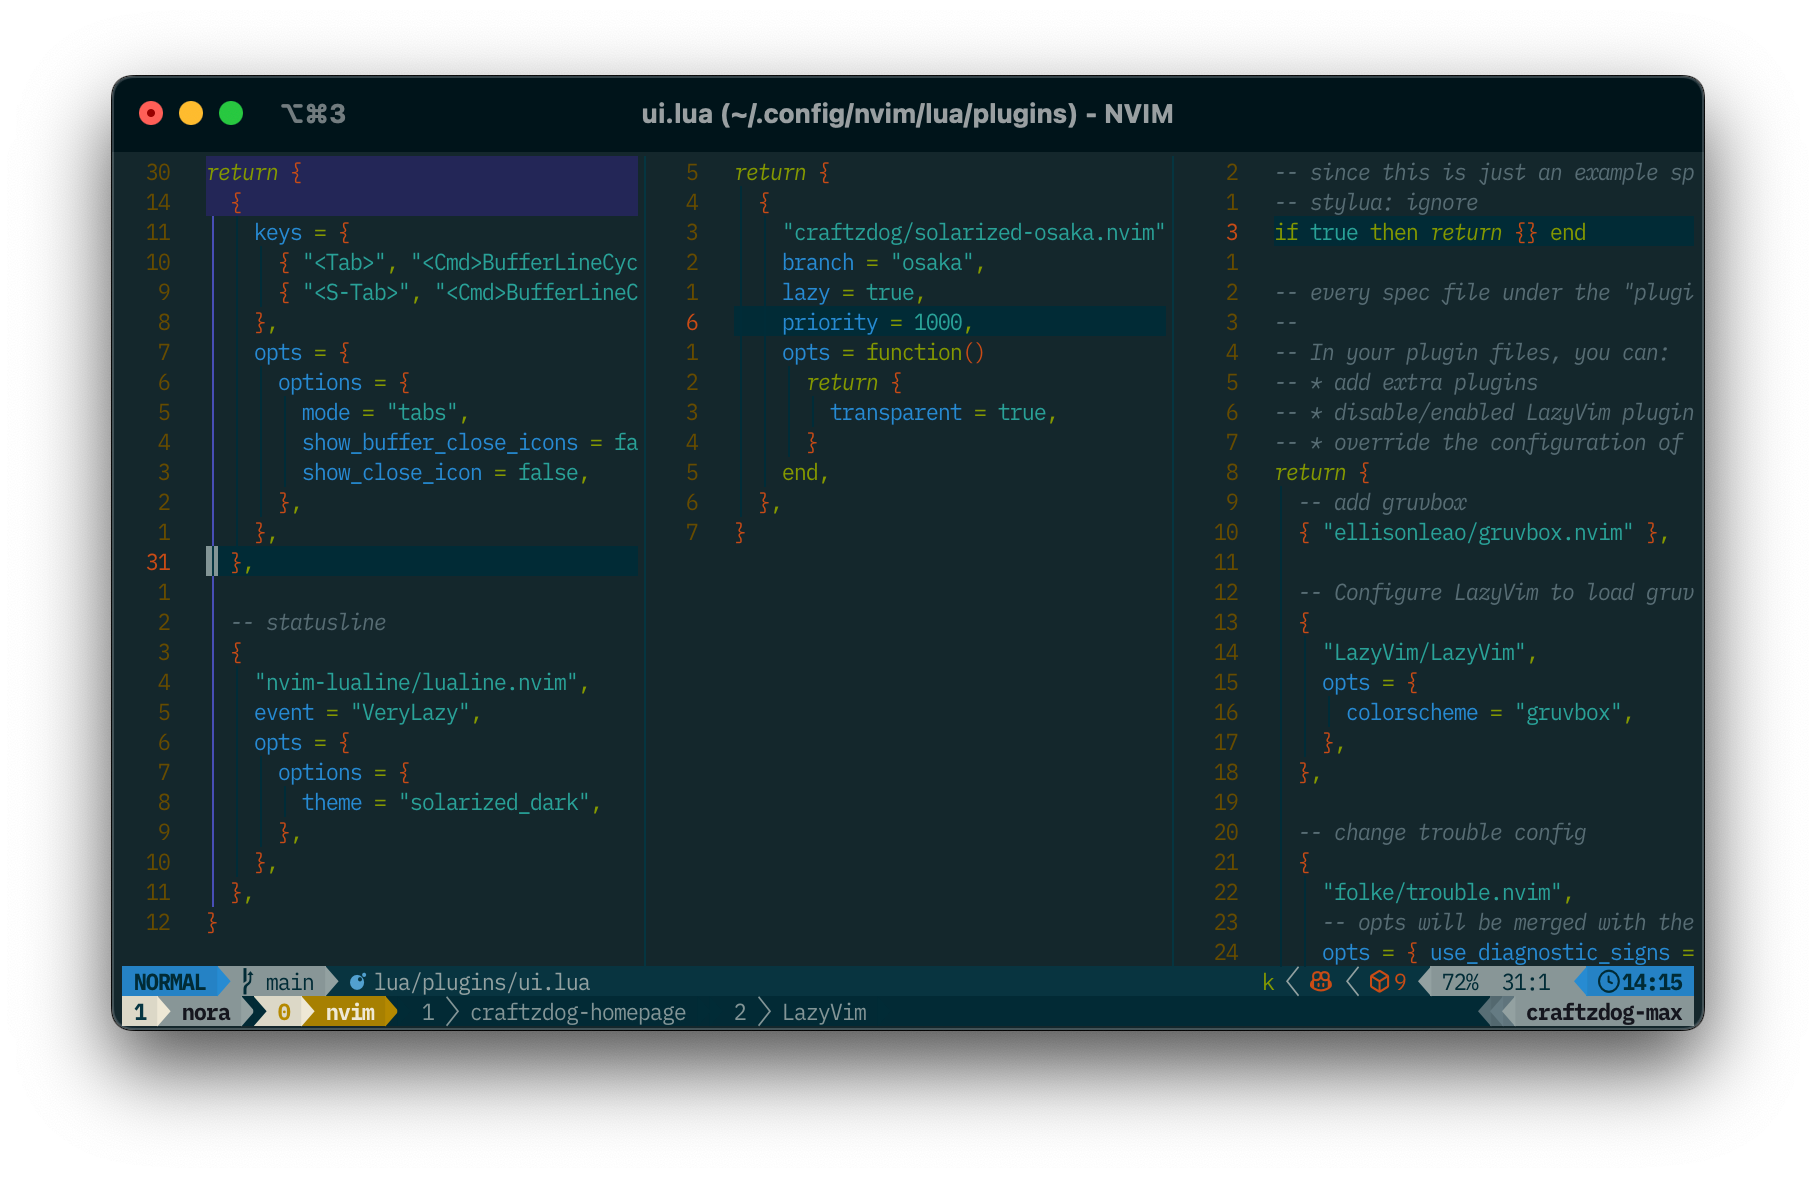
return {
  {
    "craftzdog/solarized-osaka.nvim",
    branch = "osaka",
    lazy = true,
    priority = 1000,
    opts = function()
      return {
        transparent = true,
      }
    end,
  },
}
Then, relaunch nvim:
Tweak keymaps

There are so many keymaps already configured by LazyVim: ⌨️ Keymaps | LazyVim
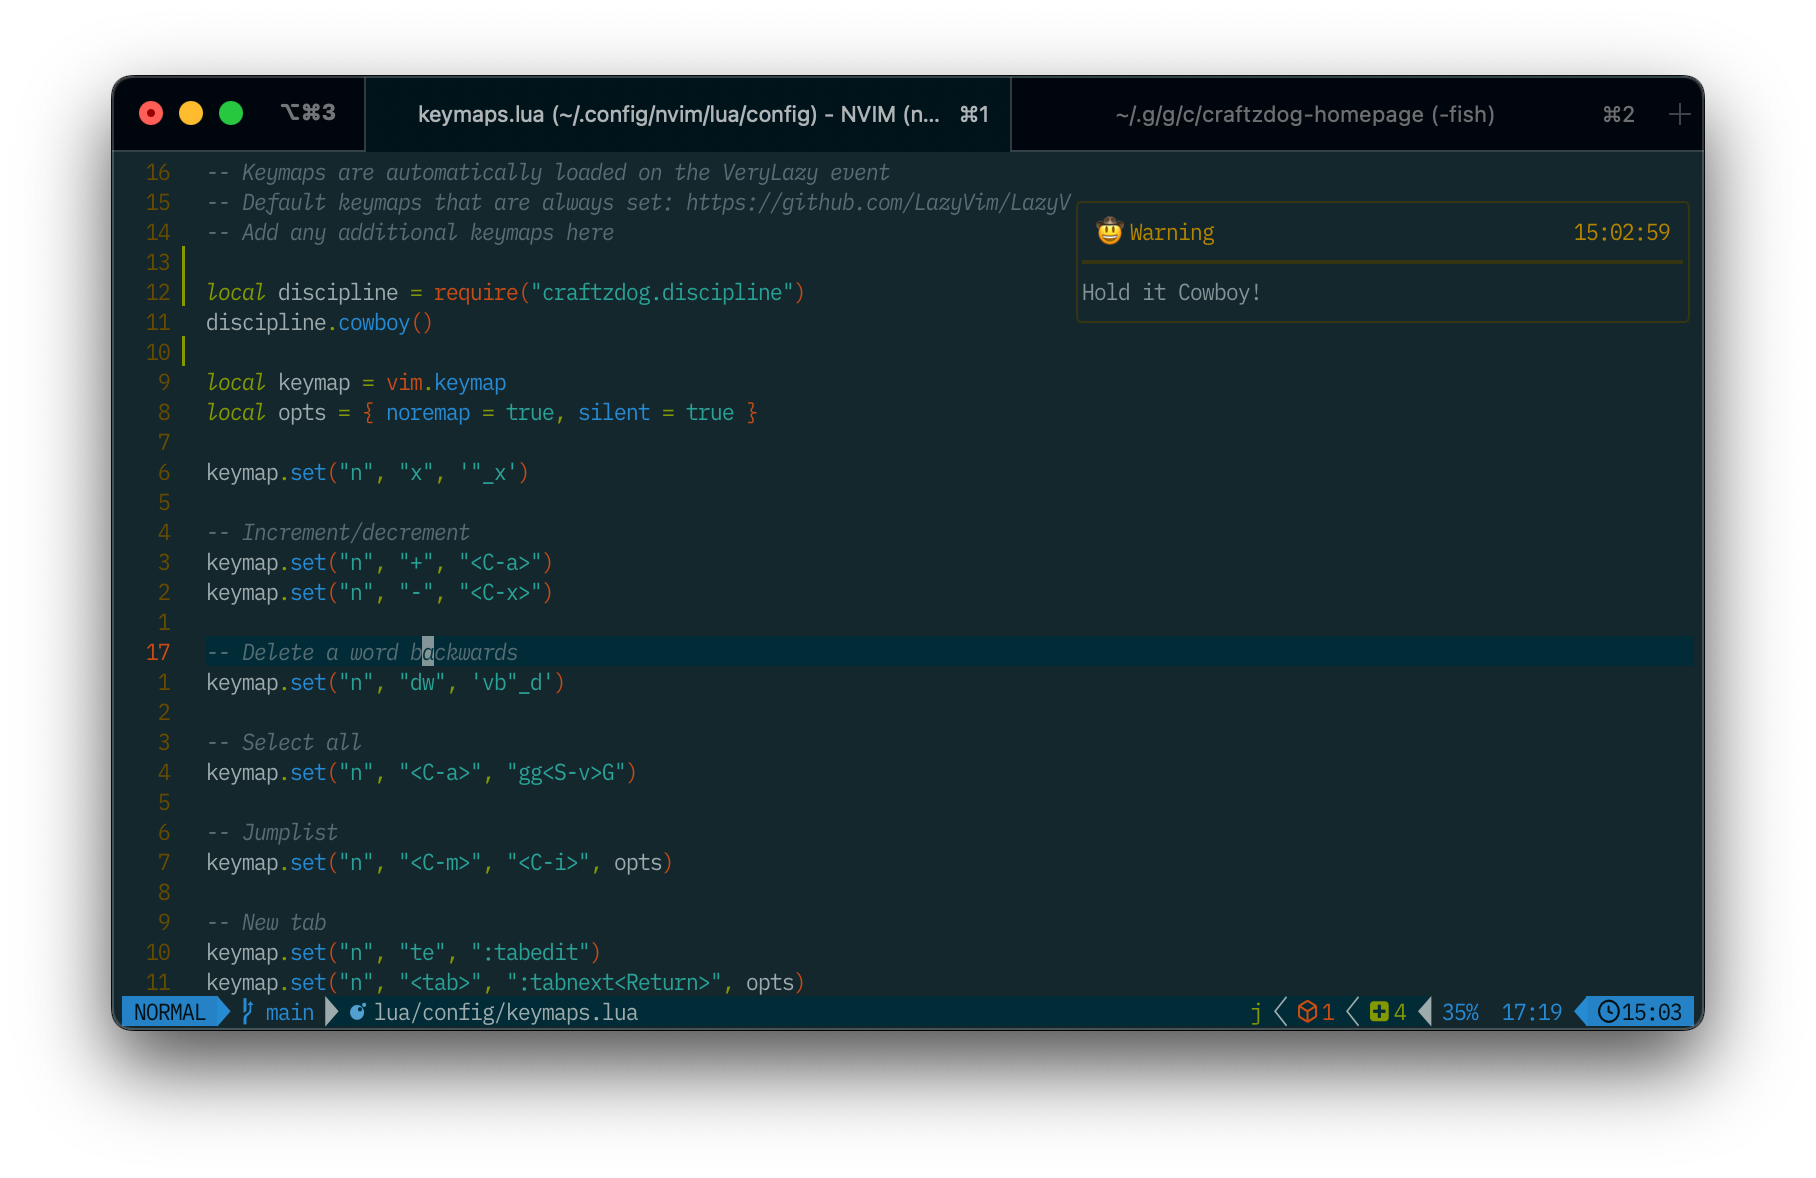
I would follow those default keymaps but there are some keymaps I would like to keep using from my setup. Create a file: lua/config/keymaps.lua. And add customizations as you like, something like:
-- Disable continuations
keymap.set("n", "<Leader>o", "o<Esc>^Da", opts)
keymap.set("n", "<Leader>O", "O<Esc>^Da", opts)

-- New tab
keymap.set("n", "te", ":tabedit")
keymap.set("n", "<tab>", ":tabnext<Return>", opts)
keymap.set("n", "<s-tab>", ":tabprev<Return>", opts)
-- Split window
keymap.set("n", "ss", ":split<Return>", opts)
keymap.set("n", "sv", ":vsplit<Return>", opts)
-- Move window
keymap.set("n", "sh", "<C-w>h")
keymap.set("n", "sk", "<C-w>k")
keymap.set("n", "sj", "<C-w>j")
keymap.set("n", "sl", "<C-w>l")
Default LazyVim keymaps
| Key | Description | Mode |
|---|---|---|
<C-h> |
Go to left window | n, t |
<C-j> |
Go to lower window | n, t |
<C-k> |
Go to upper window | n, t |
<C-l> |
Go to right window | n, t |
<leader> is Space by default.
For example:
| Key | Description | Mode |
|---|---|---|
<leader>l |
Lazy | n |
<leader>cf |
Format | n, v |
<leader><space> |
(Telescope) Find Files (root dir) | n |
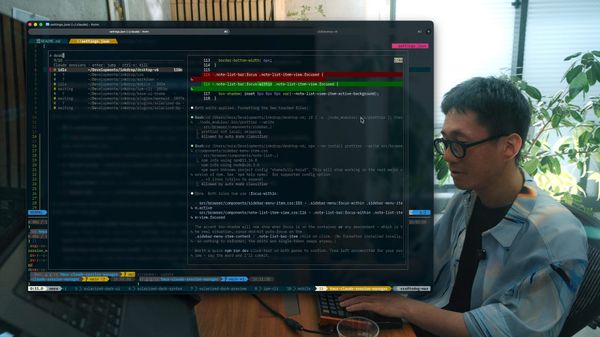
autocmds
When editing json files, the concealing feature is a bit annoying for me. So, I set conceallevel to 0 in json files.
-- Disable the concealing in some file formats
-- The default conceallevel is 3 in LazyVim
vim.api.nvim_create_autocmd({ "FileType" }, {
  pattern = { "json", "jsonc" },
  callback = function()
    vim.wo.conceallevel = 0
  end,
})
Now, doublequotes are not hidden:
But in a Markdown file, it still happens..
I'd like to disable in md files as well. Let's add "markdown" filetype:
-- Disable the concealing in some file formats
-- The default conceallevel is 3 in LazyVim
vim.api.nvim_create_autocmd("FileType", {
	pattern = { "json", "jsonc", "markdown" },
	callback = function()
		vim.wo.conceallevel = 0
	end,
})
Basic configurations
I guess it's ok to omit explaining the part of lua/options.lua.
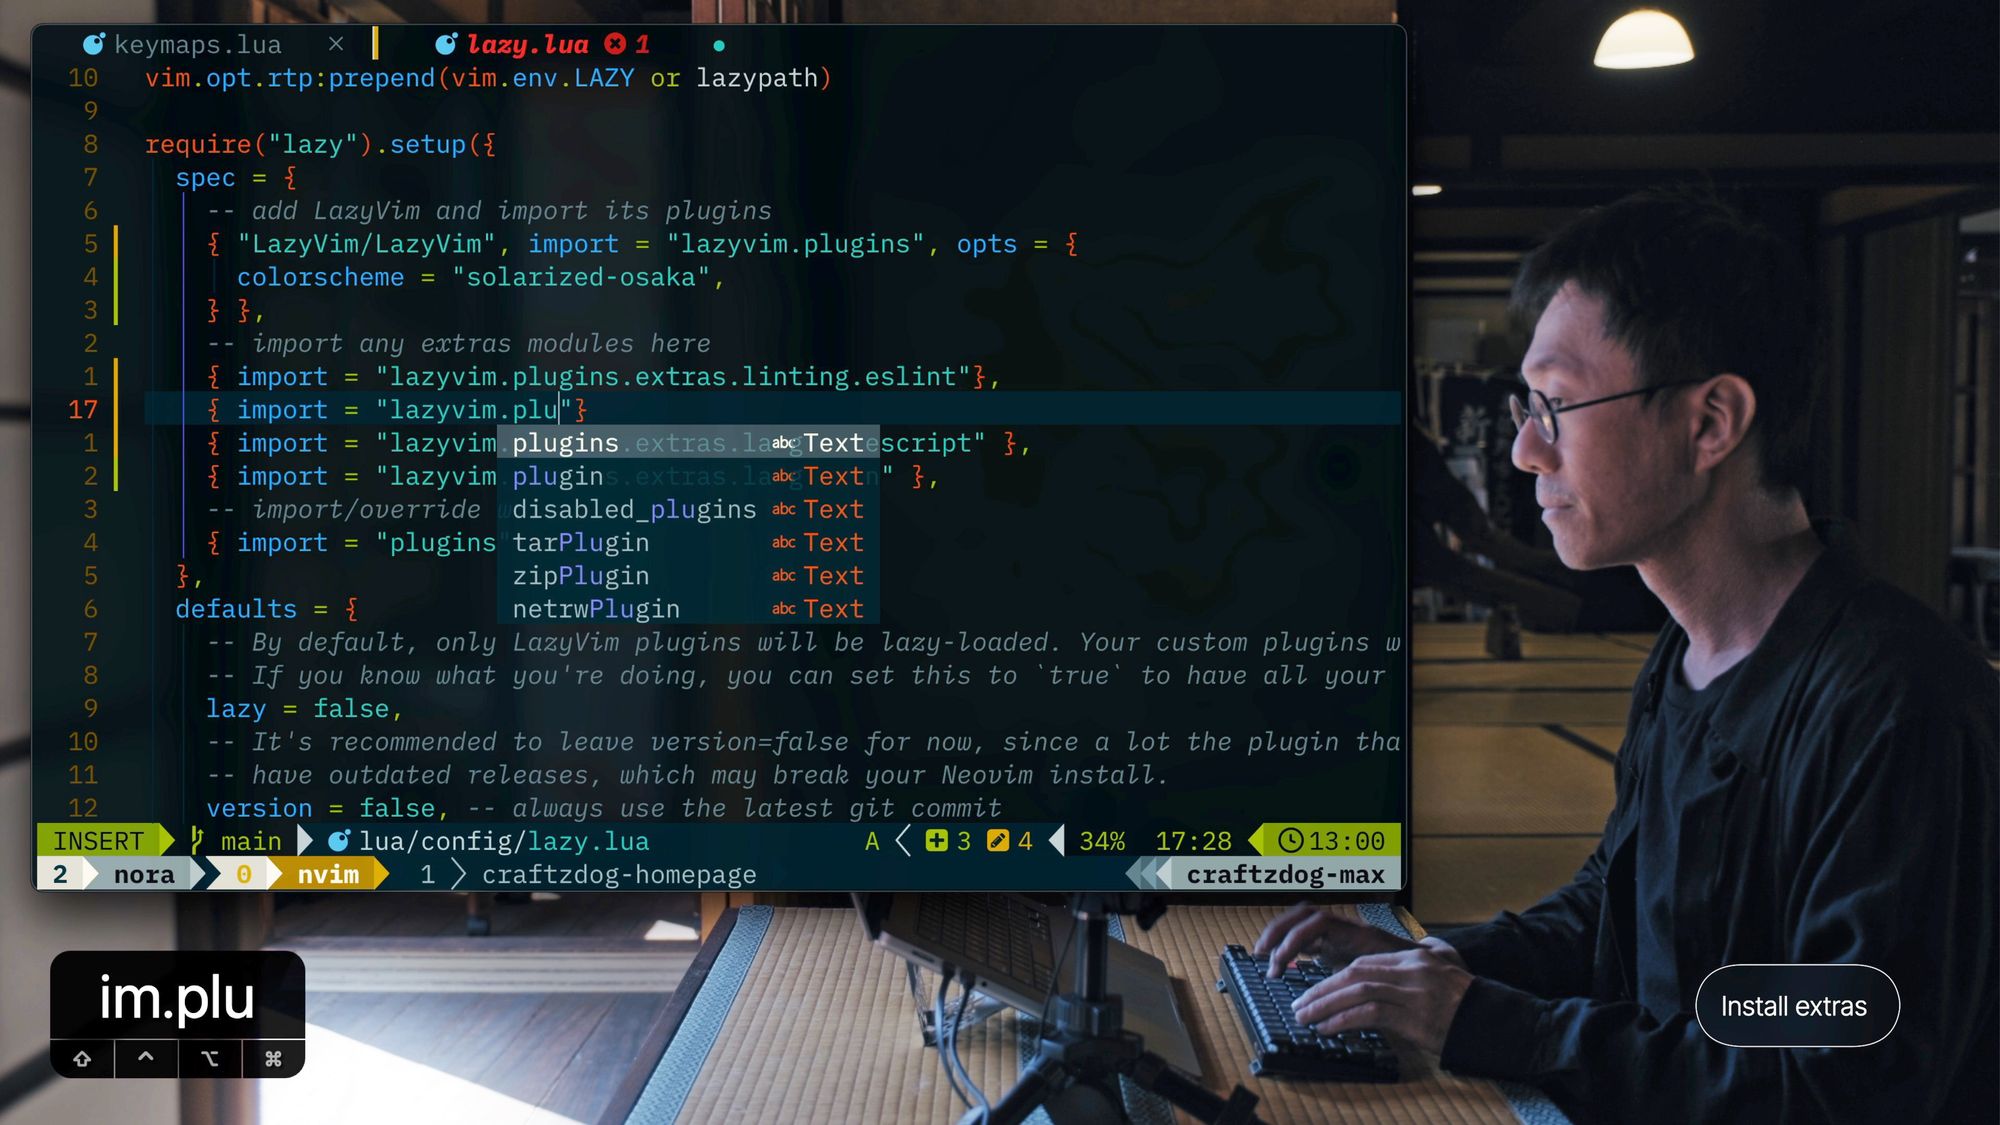
Enable extra plugins
Depending on your projects, you can enable some extra plugins to enable linting, formatting, language support, and other tools.
I mainly write JavaScript and TypeScript, so I enable the following plugins:
{ import = "lazyvim.plugins.extras.linting.eslint" },
{ import = "lazyvim.plugins.extras.formatting.prettier" },
{ import = "lazyvim.plugins.extras.lang.typescript" },
{ import = "lazyvim.plugins.extras.lang.json" },
{ import = "lazyvim.plugins.extras.lang.rust" },
{ import = "lazyvim.plugins.extras.lang.tailwind" },
{ import = "lazyvim.plugins.extras.coding.copilot" },
{ import = "lazyvim.plugins.extras.util.mini-hipatterns" },
🤠 Discipline: Cowboy
It is copied from Folke's dotfiles. It restricts repeating cursor movement keys.
It helps you train yourself to rely on repeaters, and you’ll become the more effective for it.
I'm still not good at using repeaters, haha.
- You may also like: Moving Blazingly Fast With The Core Vim Motions | Barbarian Meets Coding
Configure plugins
You can look into what plugins are preconfigured in LazyVim like so:
cd ~/.local/share/nvim/lazy/LazyVim/
vim lua/lazyvim/plugins/editor.lua
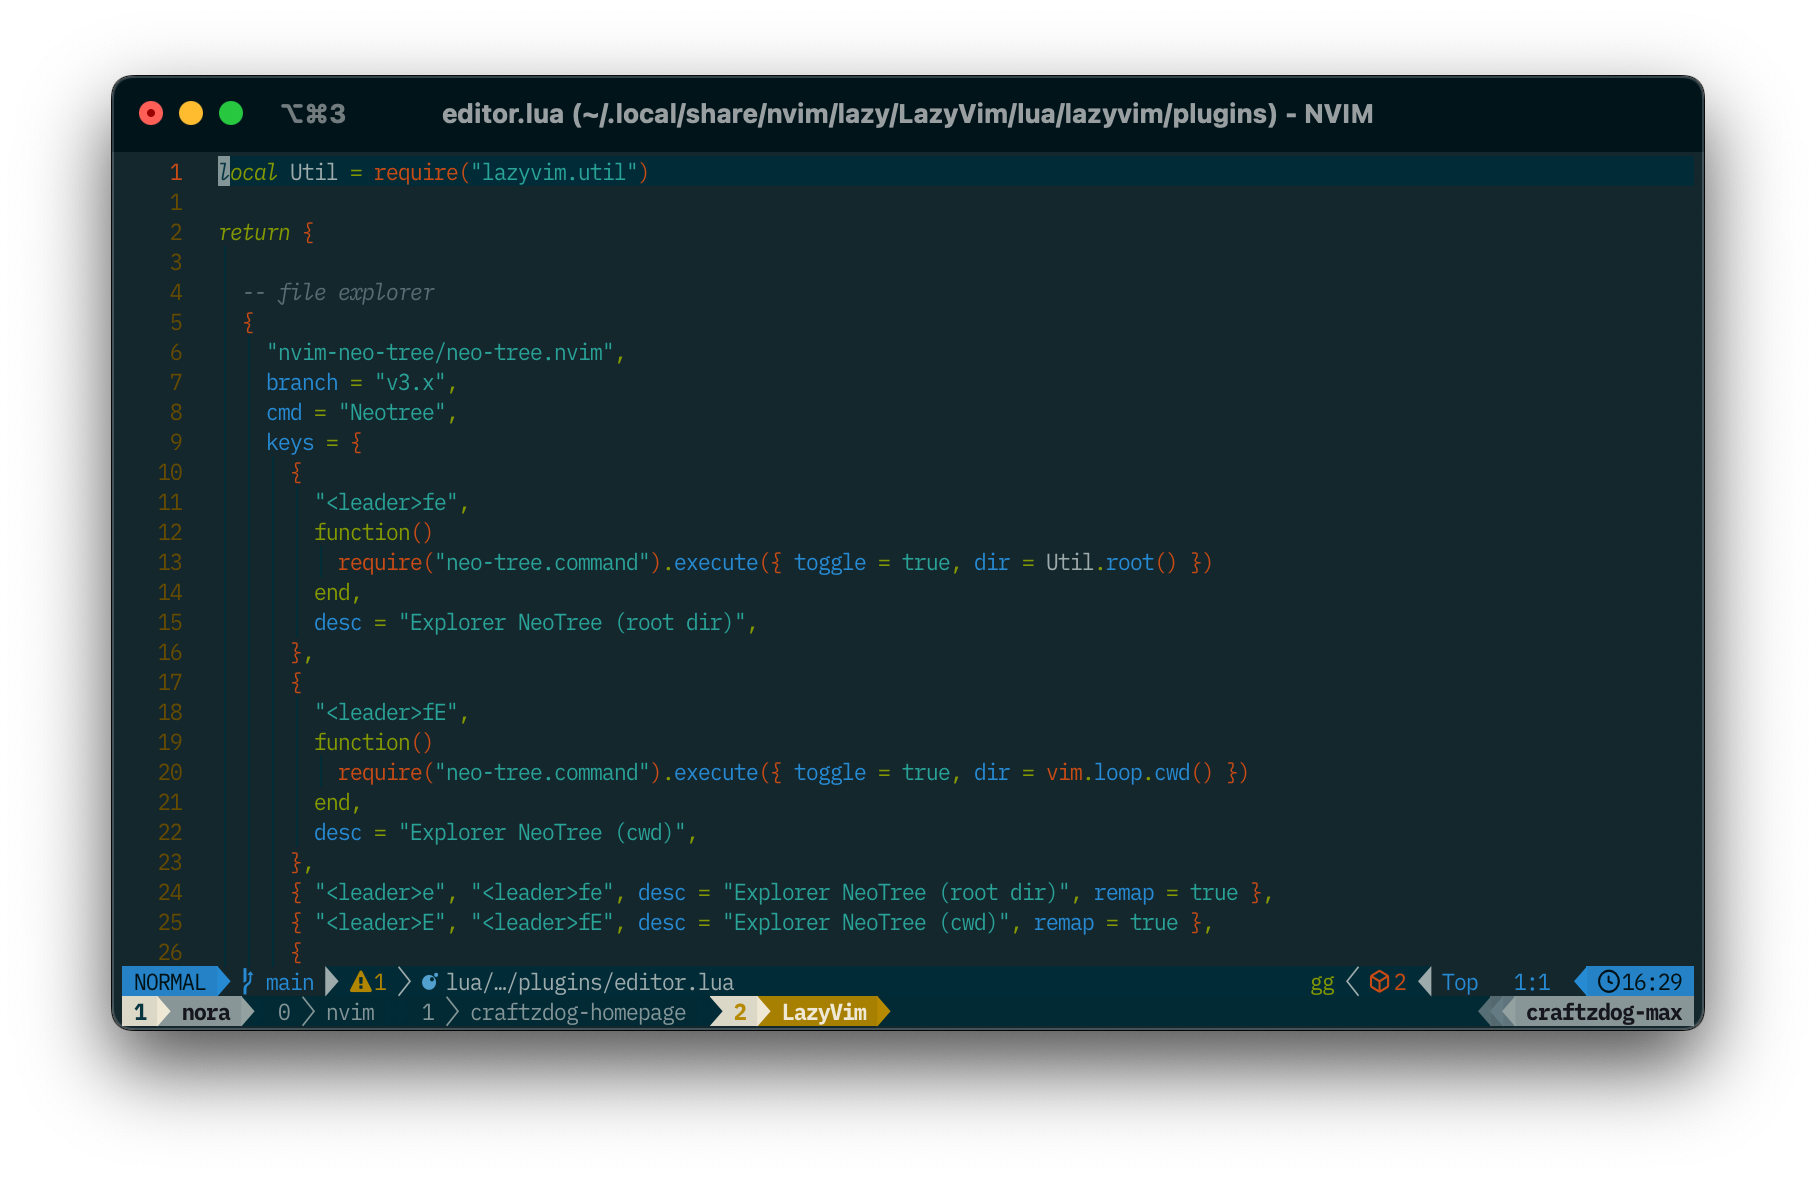
If you find something wrong or broken, you can check the source and what configuration causes the issue.
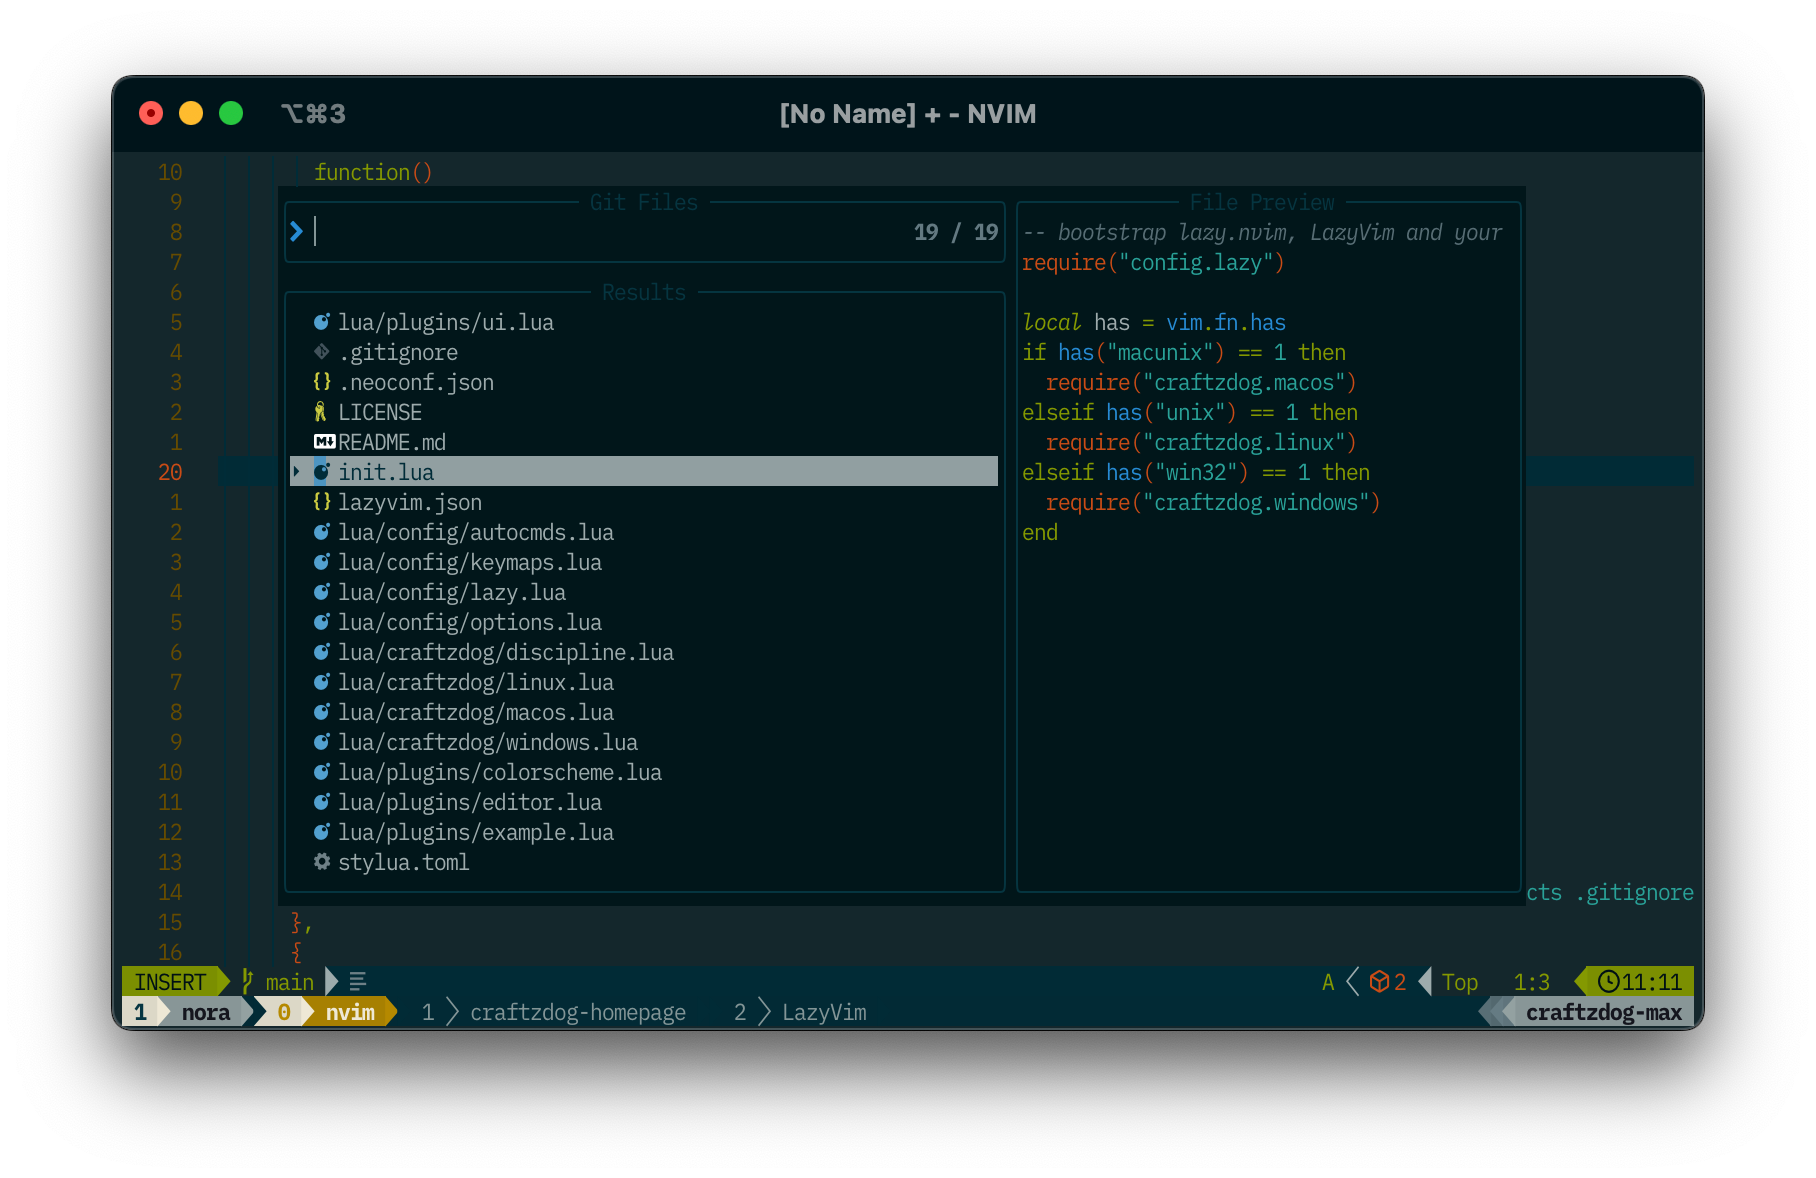
telescope
Telescope is one of the most often used plugins for me.
It is an extendable fuzzy finder over lists.
You can find files, diagnostics, buffers, and various lists quickly.
Press <Leader>ff to show files:
It works pretty well out of the box on LazyVim, but I'd like to have a few customizations for my workflow.
Let's customize it.
vim lua/plugins/editor.lua
I often use the nvim-telescope/telescope-file-browser.nvim addon as a filer instead of working on the file tree view.
return {
  {
    "telescope.nvim",
    dependencies = {
      "nvim-telescope/telescope-file-browser.nvim",
    },
Then, I assigned some shortcuts:
| Key | Description | Mode |
|---|---|---|
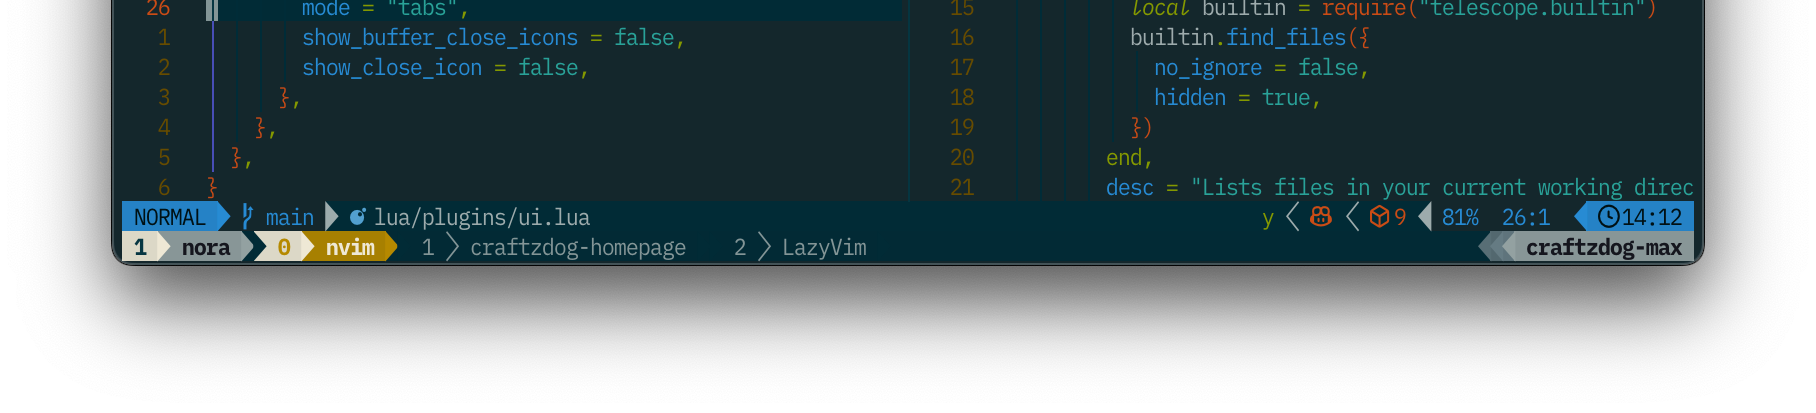
;f |
Lists files in your current working directory, respects .gitignore | n |
;r |
Search for a string in your current working directory and get results live as you type, respects .gitignore | n |
\\ |
Lists open buffers | n |
;t |
Lists available help tags and opens a new window with the relevant help info on <cr> |
n |
;; |
Resume the previous telescope picker | n |
;e |
Lists Diagnostics for all open buffers or a specific buffer | n |
;s |
Lists Function names, variables, from Treesitter | n |
sf |
Open File Browser with the path of the current buffer | n |
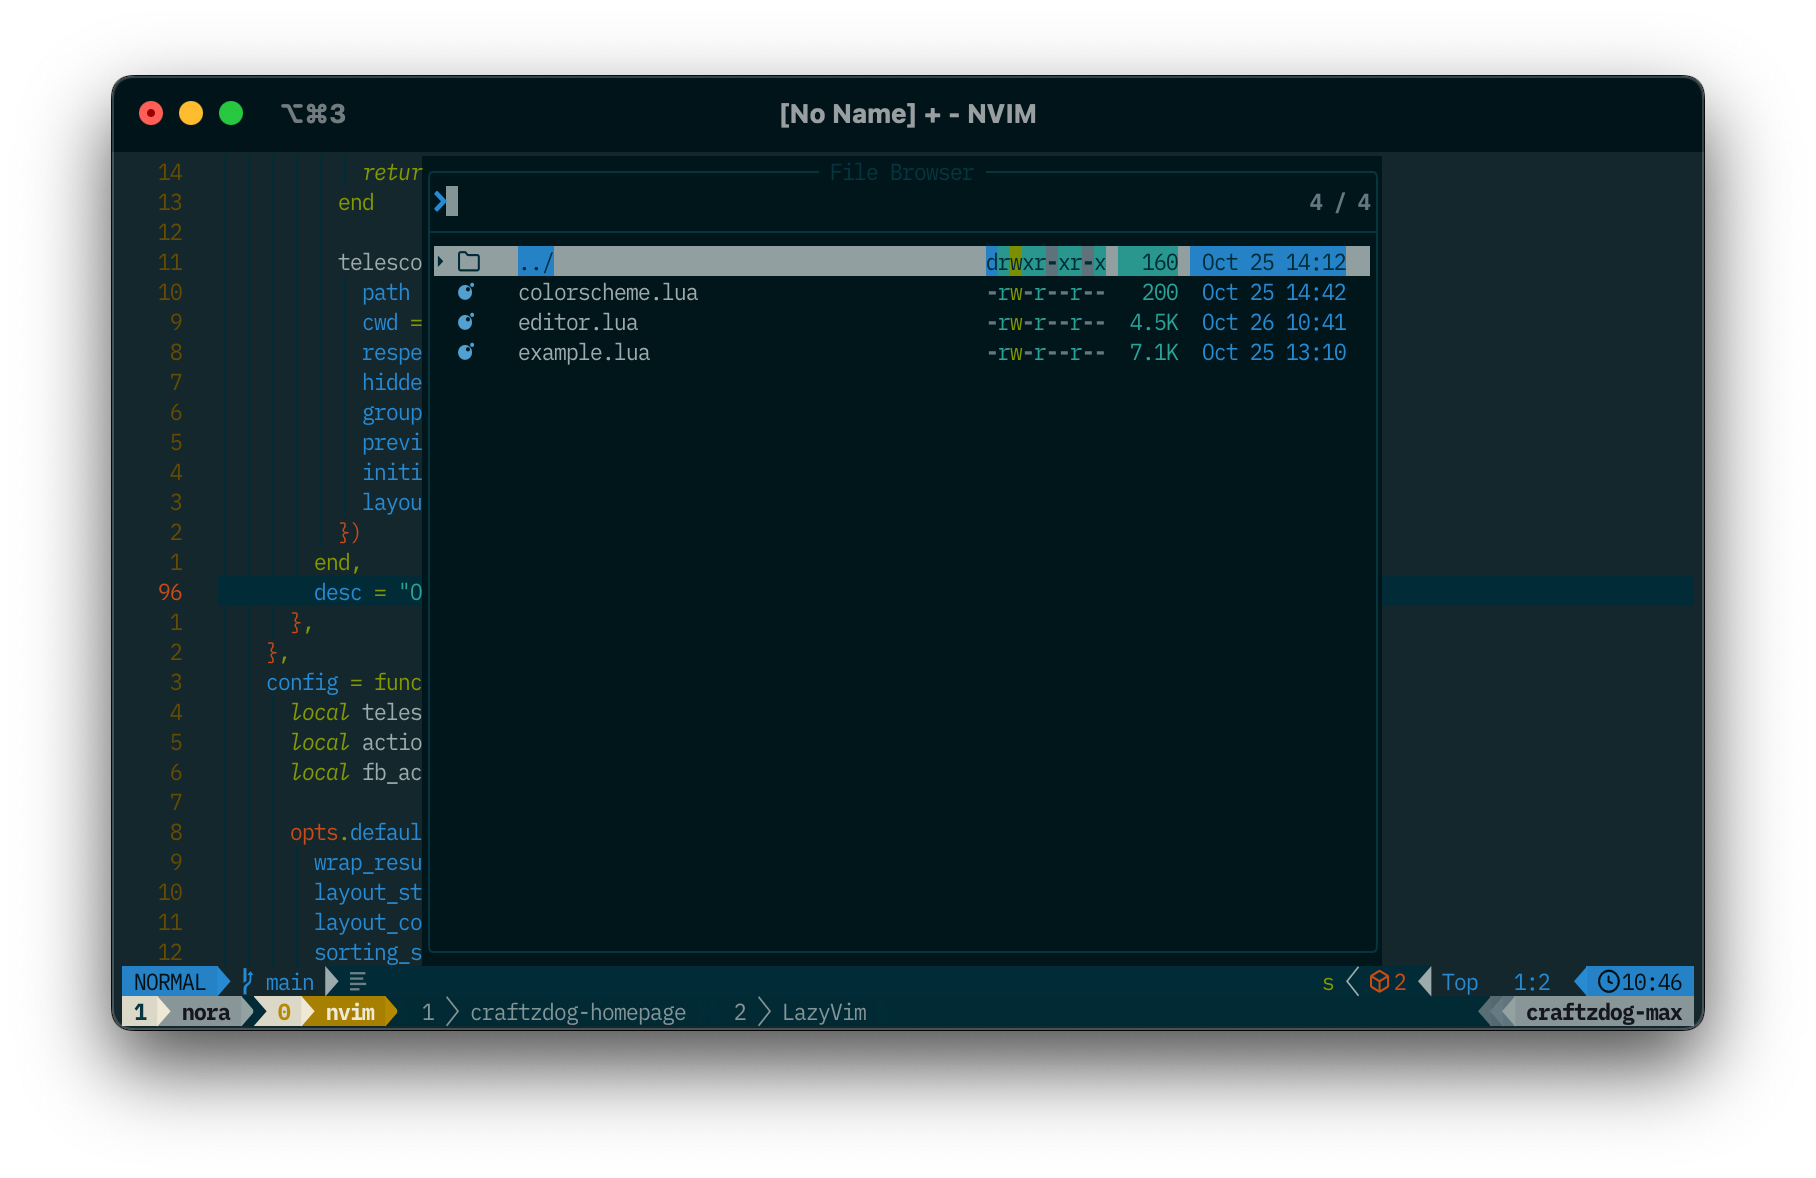
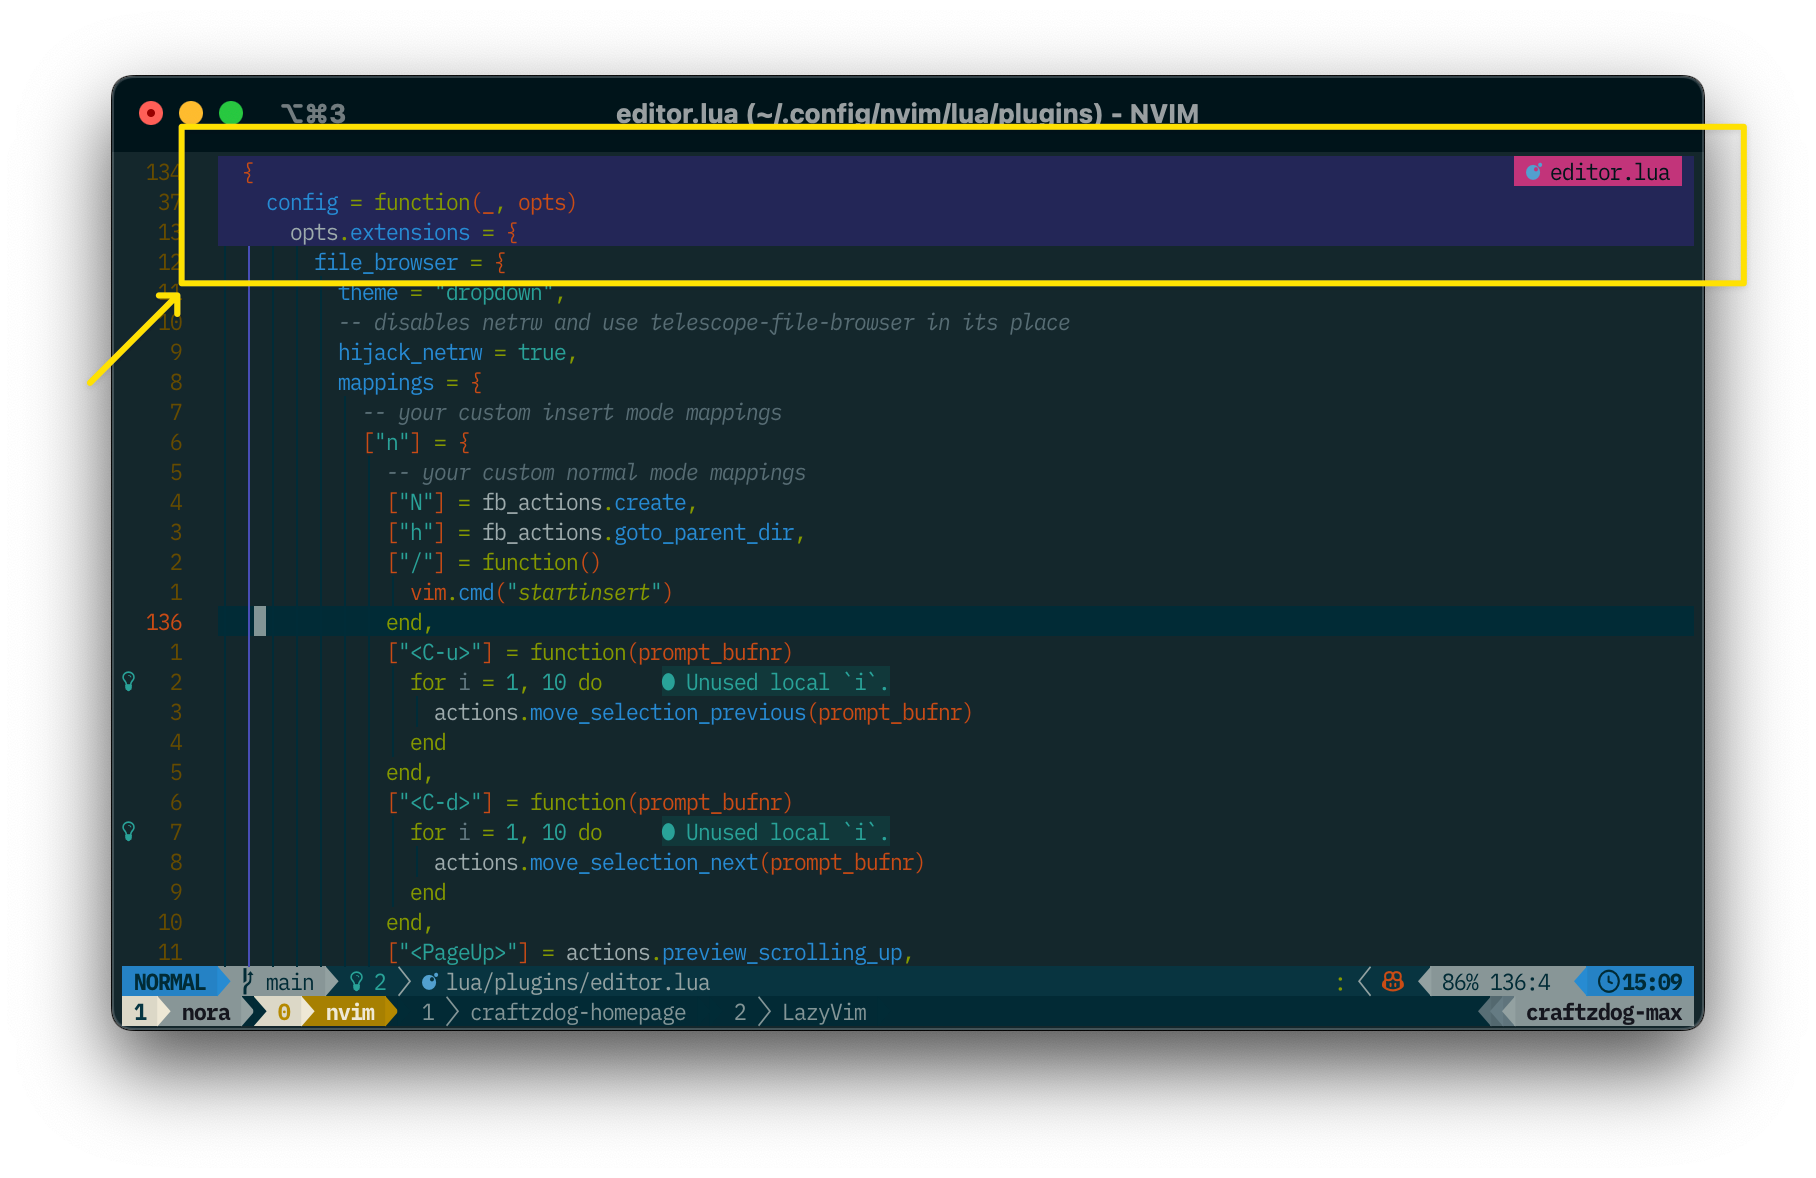
For File Browser, I assined a few keys to manage files like so:
		config = function(_, opts)
			local telescope = require("telescope")
			local actions = require("telescope.actions")
			local fb_actions = require("telescope").extensions.file_browser.actions
      ...
			opts.extensions = {
				file_browser = {
					theme = "dropdown",
					-- disables netrw and use telescope-file-browser in its place
					hijack_netrw = true,
					mappings = {
						-- your custom insert mode mappings
						["n"] = {
							-- your custom normal mode mappings
							["N"] = fb_actions.create,
							["h"] = fb_actions.goto_parent_dir,
							["/"] = function()
								vim.cmd("startinsert")
							end,
							["<C-u>"] = function(prompt_bufnr)
								for i = 1, 10 do
									actions.move_selection_previous(prompt_bufnr)
								end
							end,
							["<C-d>"] = function(prompt_bufnr)
								for i = 1, 10 do
									actions.move_selection_next(prompt_bufnr)
								end
							end,
							["<PageUp>"] = actions.preview_scrolling_up,
							["<PageDown>"] = actions.preview_scrolling_down,
						},
					},
				},
			}
| Key | Description | Mode |
|---|---|---|
N |
Create a new file | n |
h |
Go to parent directory | n |
/ |
Enter the insert mode to search files | n |
<C-u> |
Move the selection 10 lines up | n |
<C-d> |
Move the selection 10 lines down | n |
<PageUp> |
Scroll up the preview pane | n |
<PageDown> |
Scroll down the preview pane | n |
Noice
folkeNoice improves the UI for messages, cmdline and the popupmenu.
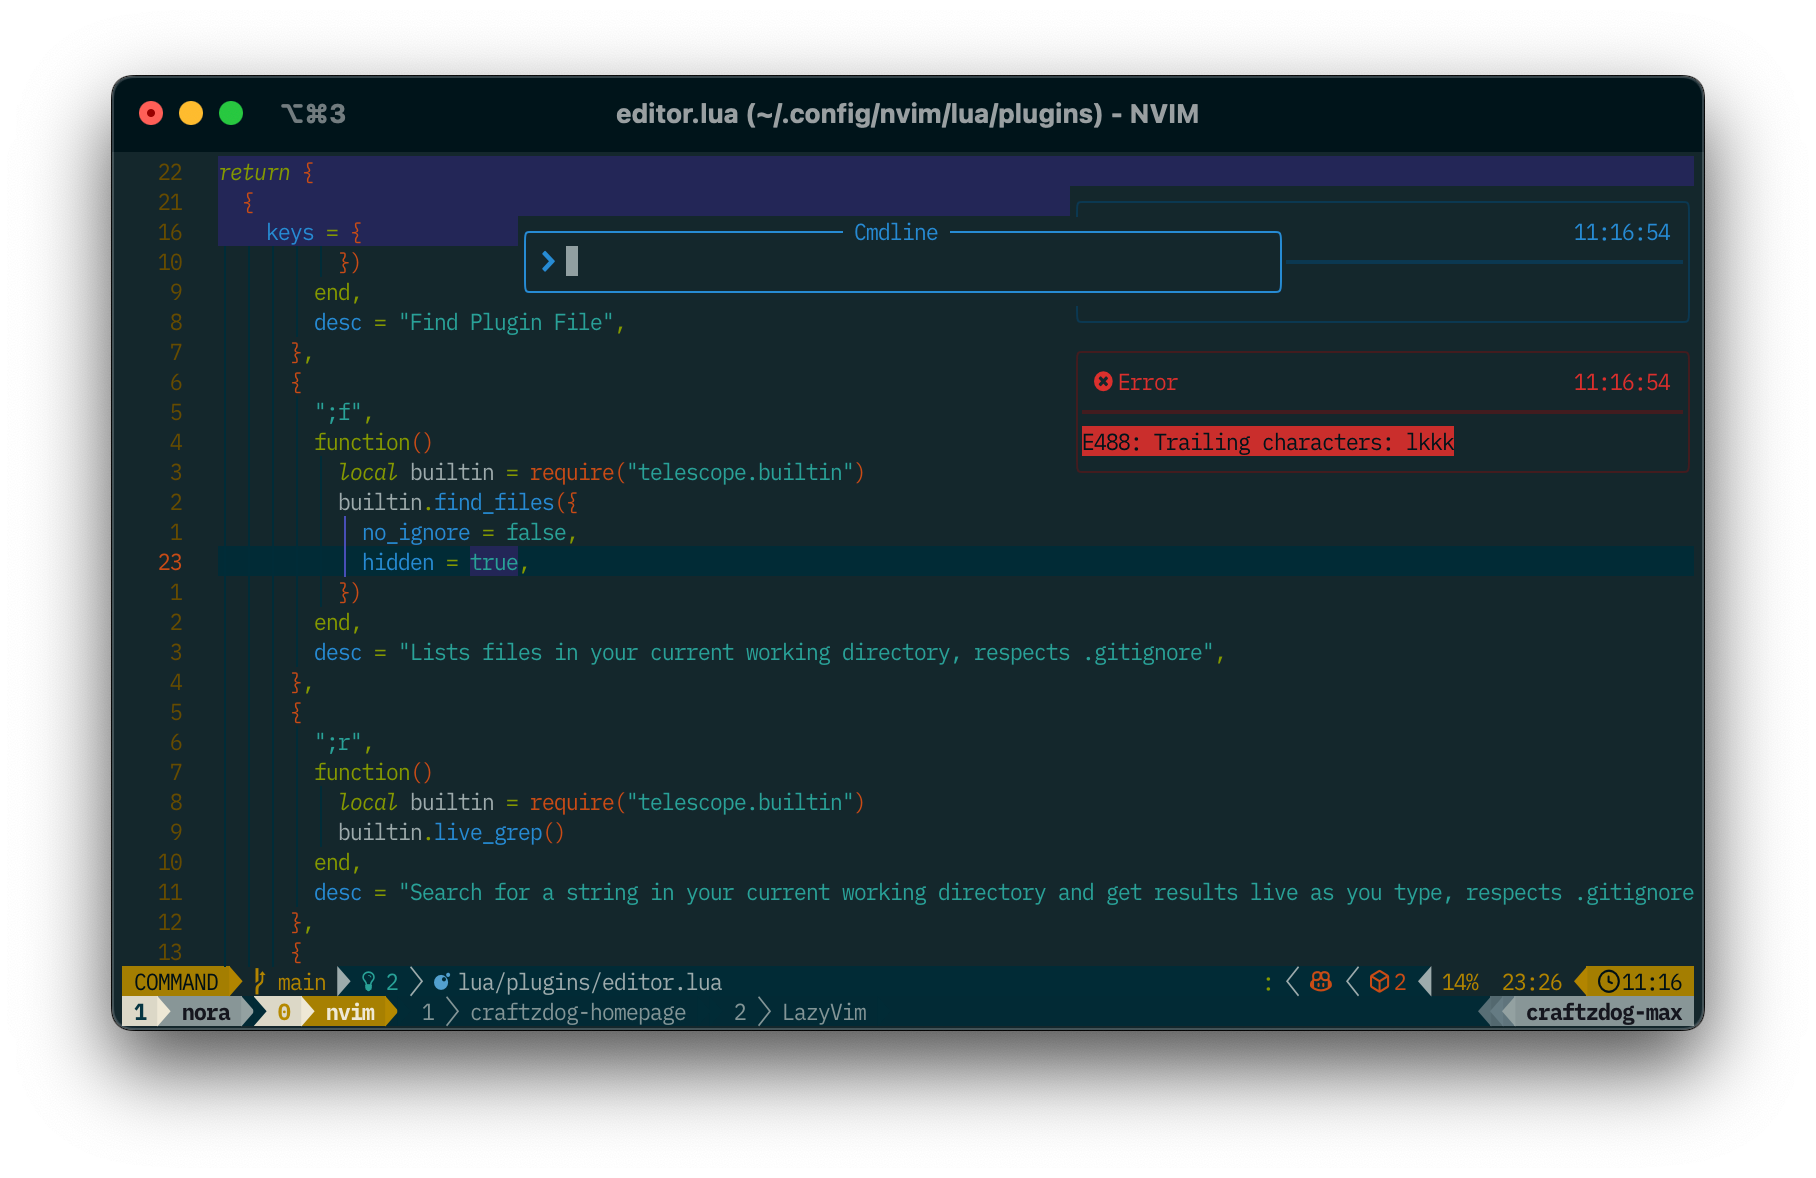
As you've been already seeing, the command line input bar looks differently. Try presssing ':':
Currently, the LSP HoverDoc doesn't have a border:
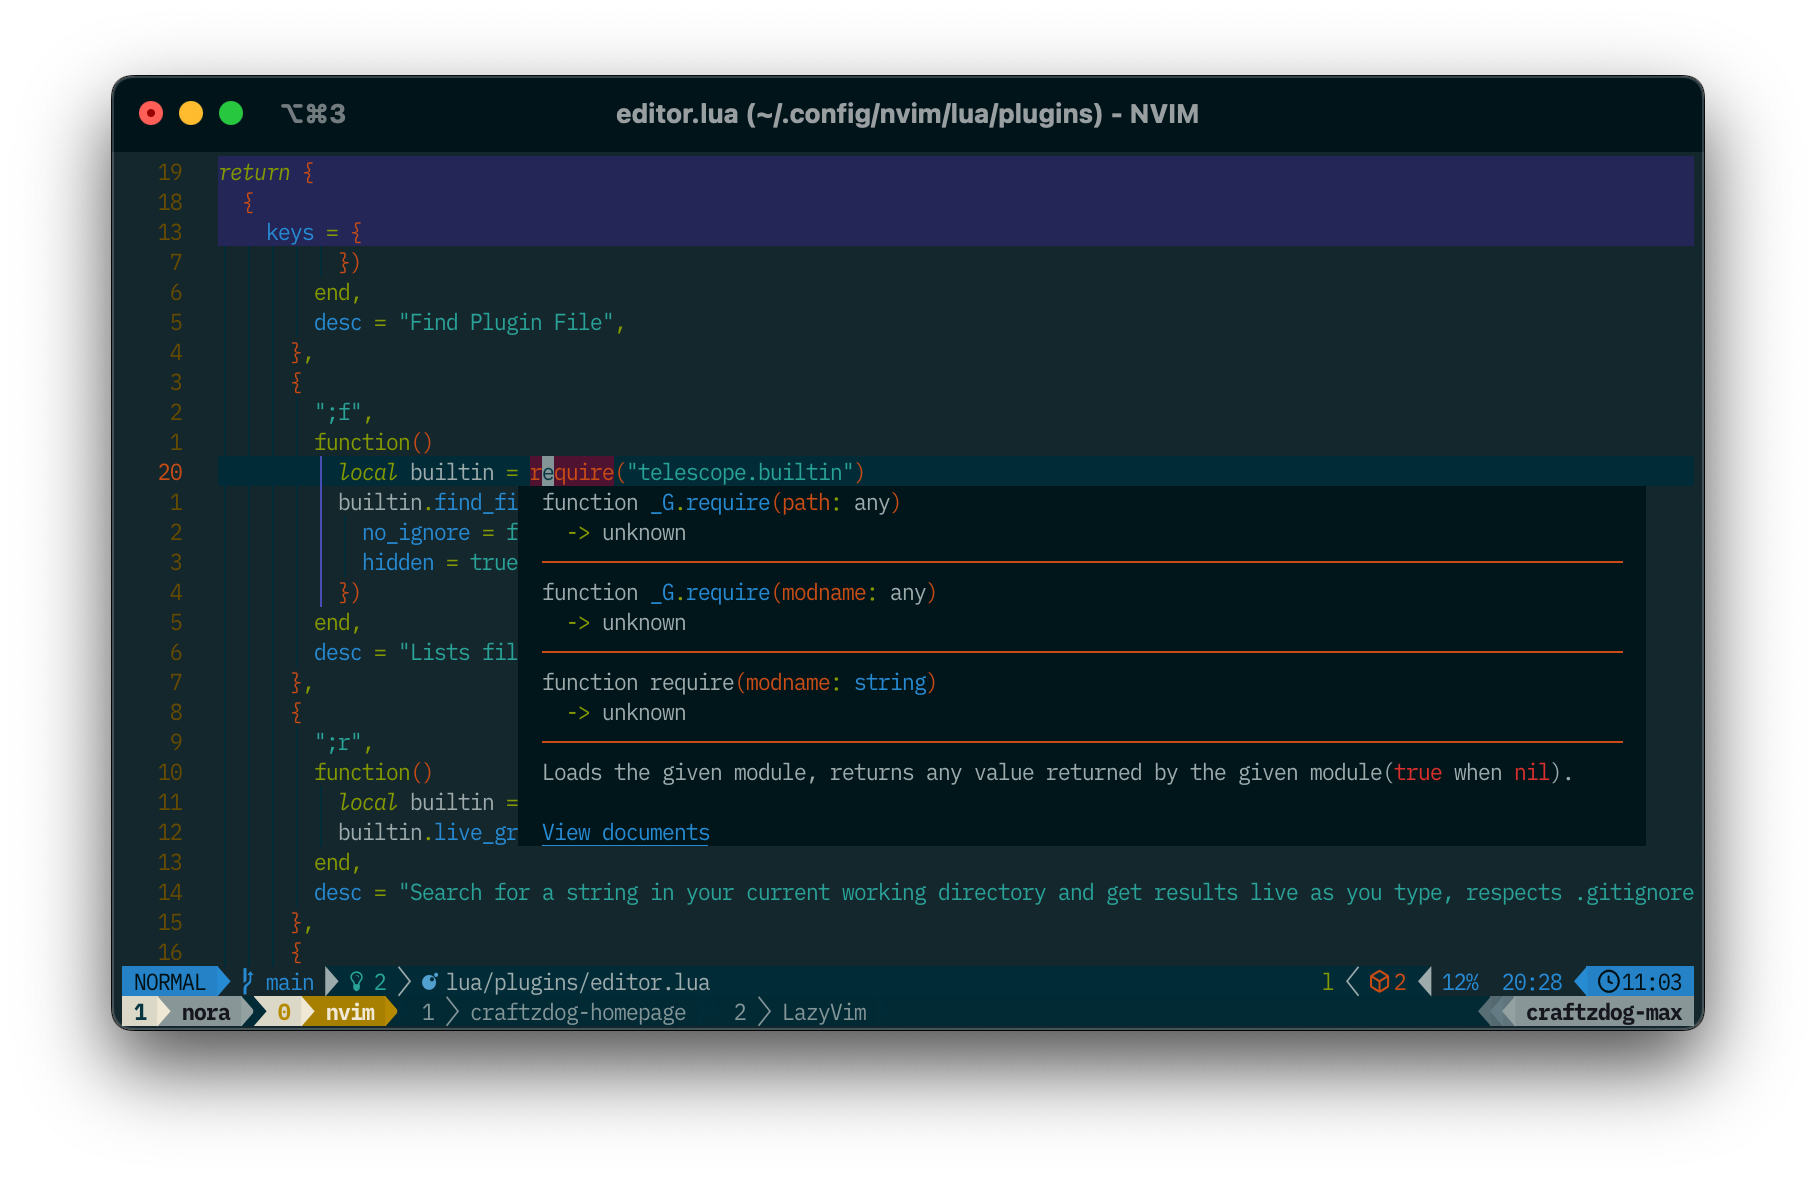
It is hard to see for me. Let's change it. Create lua/plugins/ui.lua.
return {
  {
    "folke/noice.nvim",
    opts = function(_, opts)
      opts.presets.lsp_doc_border = true
    end,
  },
}
The result:

Cool. Also, I'd like to diplay messages a little bit longer.
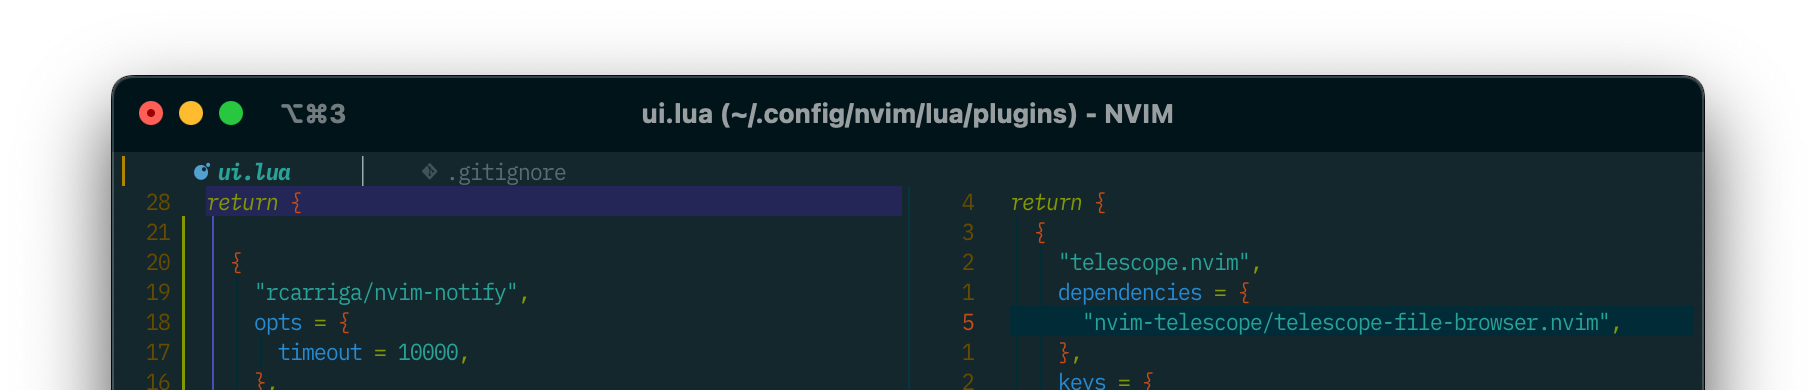
Noice uses nvim-notify to display messages in LazyVim. Let's change the timeout option of nvim-notify like so:
  {
    "rcarriga/nvim-notify",
    opts = {
      timeout = 10000,
    },
  },
You can clear messages by pressing <leader>snd.
Bufferline
Bufferline provides you fancy-looking tabs, which include filetype icons and close buttons:
By default, it shows every buffer on the buffer line.
I'd like it to show only tabpages.
And I also don't use mouse on Neovim, so I don't need close buttons.
{
  "akinsho/bufferline.nvim",
  event = "VeryLazy",
  keys = {
    { "<Tab>", "<Cmd>BufferLineCycleNext<CR>", desc = "Next tab" },
    { "<S-Tab>", "<Cmd>BufferLineCyclePrev<CR>", desc = "Prev tab" },
  },
  opts = {
    options = {
      mode = "tabs",
      show_buffer_close_icons = false,
      show_close_icon = false,
    },
  },
},
Looks good!
Status line
- GitHub - nvim-lualine/lualine.nvim: A blazing fast and easy to configure neovim statusline plugin written in pure lua.
- lualine | LazyVim
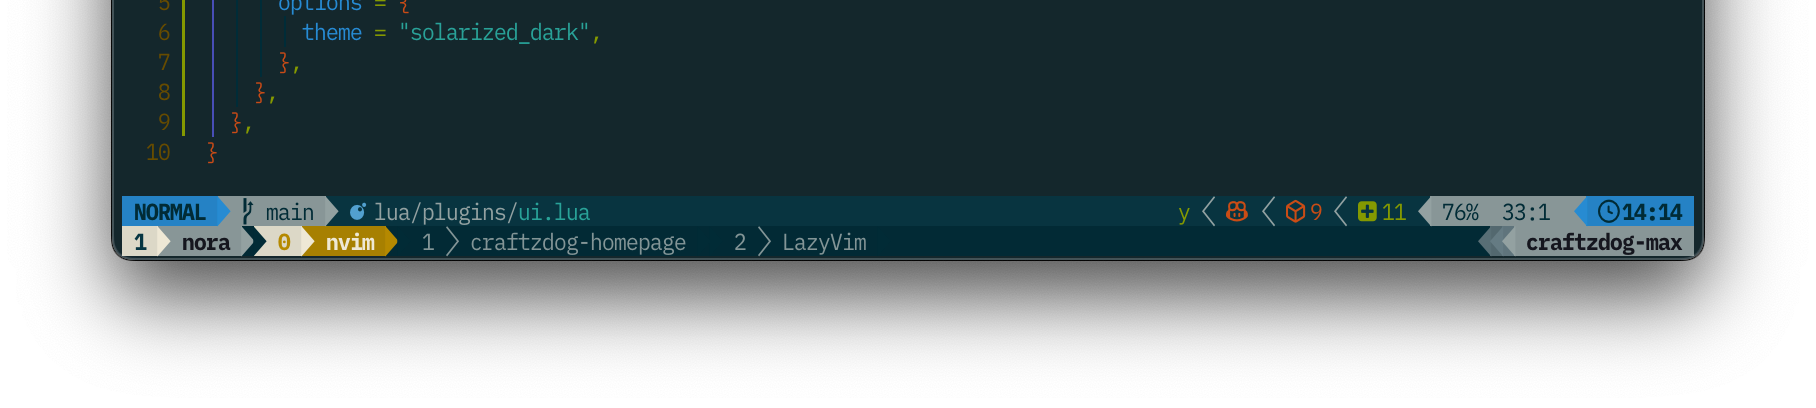
Let's take a look at statusline. It does not match the current Solarized theme:
lualine supports the solarized_dark theme out of the box. Let's use it.
  -- statusline
  {
    "nvim-lualine/lualine.nvim",
    event = "VeryLazy",
    opts = {
      options = {
        theme = "solarized_dark",
      },
    },
  },
Cool!
Floating statuslines
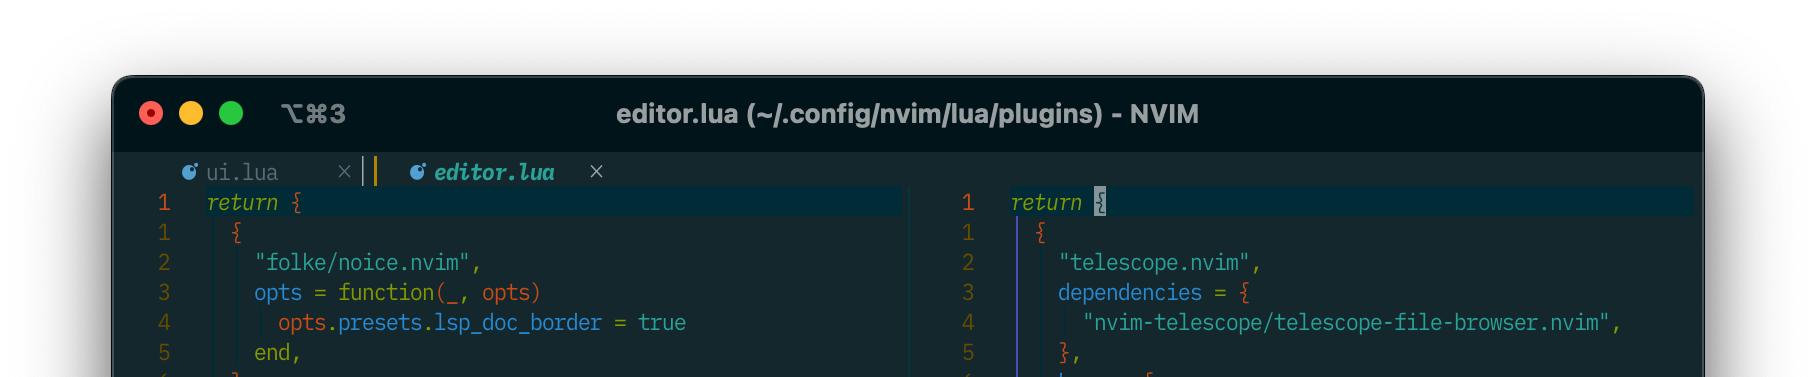
When editing many files in a single tabpage, you can't quickly know which file is opened in the tabpage. That's because lualine's globalstatus option is set to false in LazyVim.
If it was globalstatus = false, it looks like this:
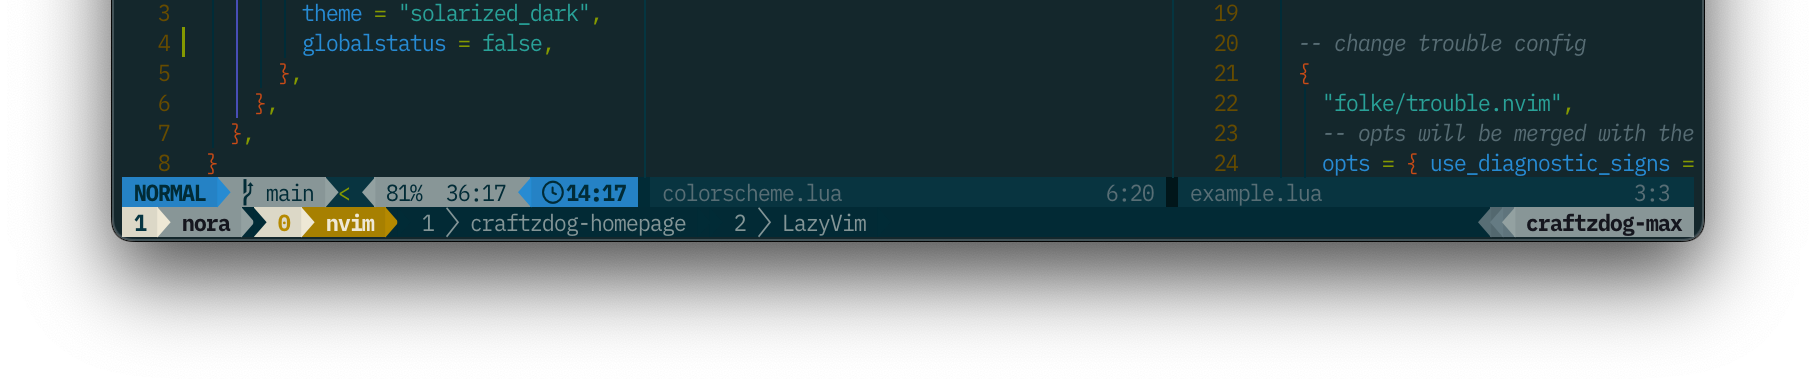
But, the filename of the active pane is collapsed due to the narrow pane width, as you can see.
So, I'd like to try incline.nvim this time to solve this issue.
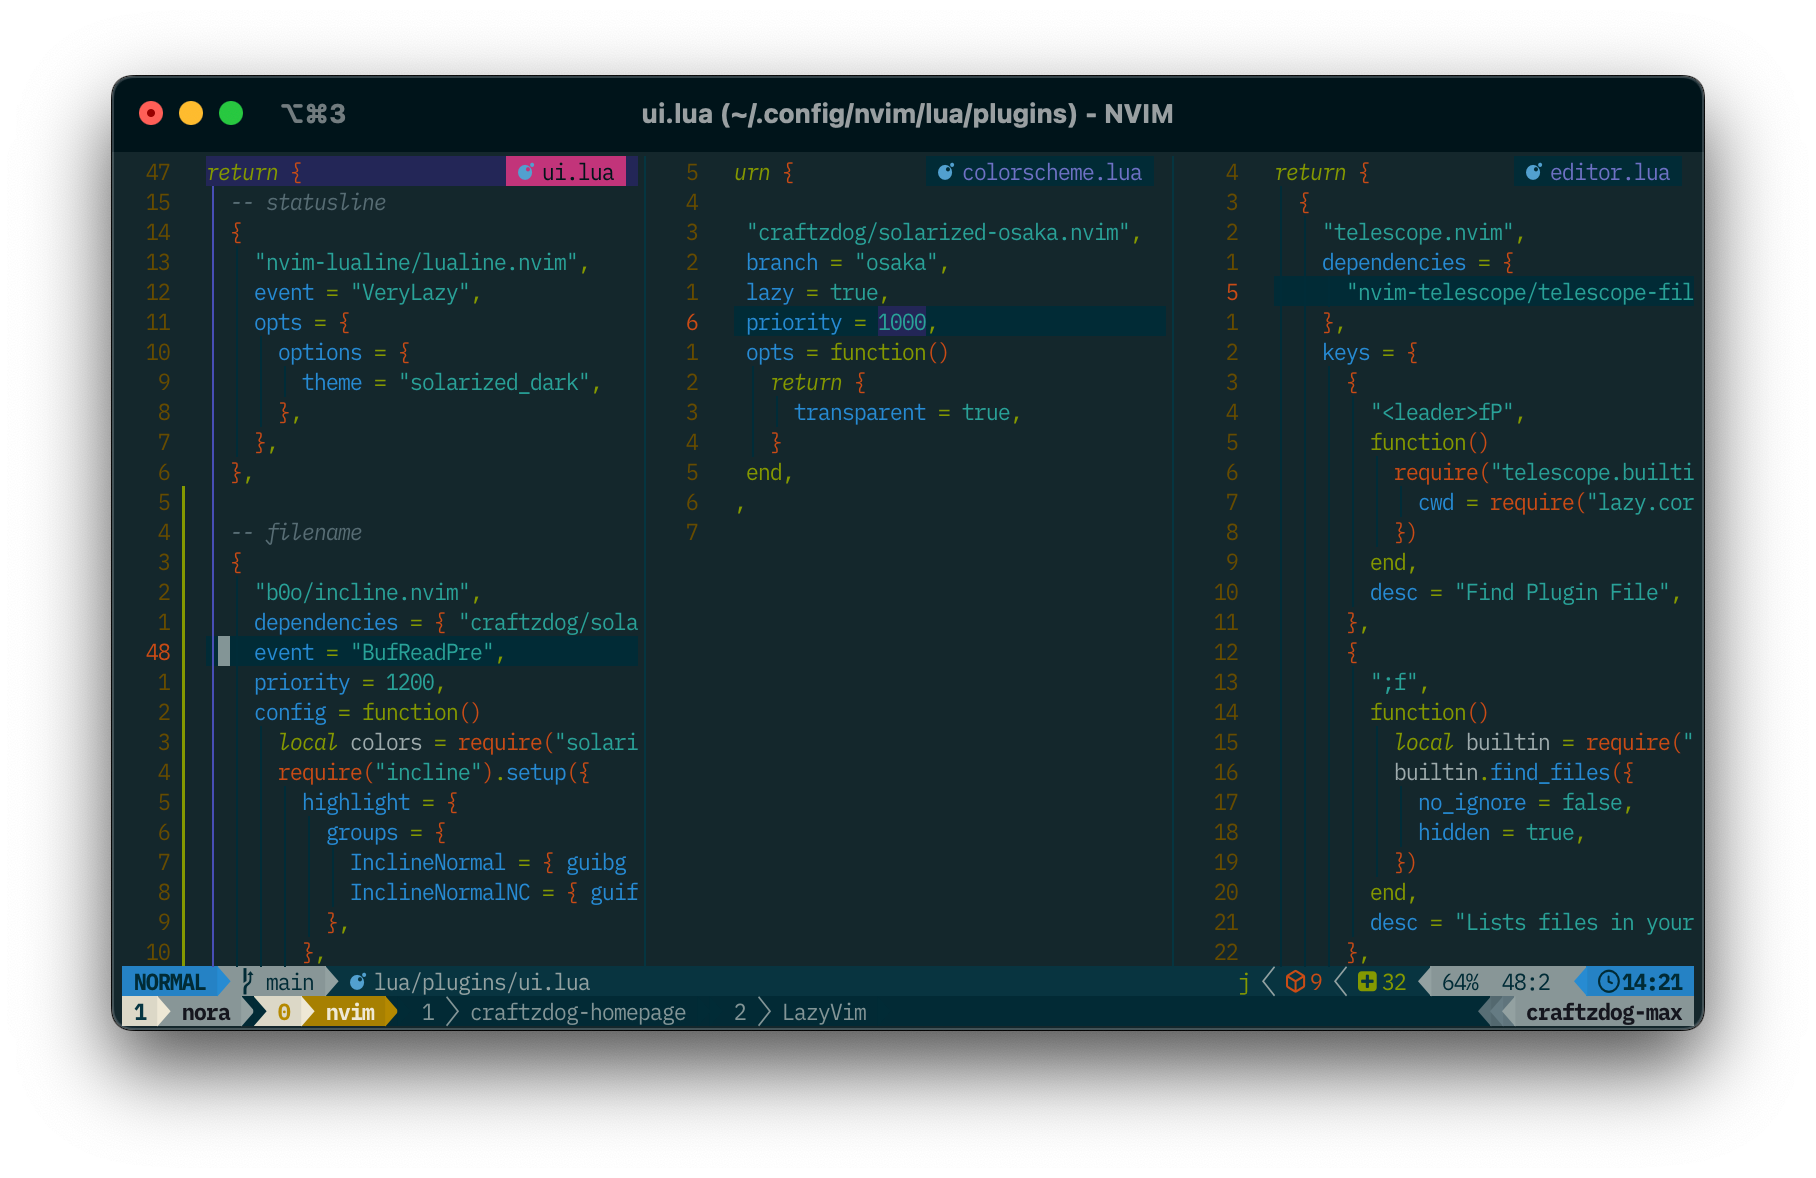
-- filename
{
  "b0o/incline.nvim",
  dependencies = { "craftzdog/solarized-osaka.nvim" },
  event = "BufReadPre",
  priority = 1200,
  config = function()
    local colors = require("solarized-osaka.colors").setup()
    require("incline").setup({
      highlight = {
        groups = {
          InclineNormal = { guibg = colors.magenta500, guifg = colors.base04 },
          InclineNormalNC = { guifg = colors.violet500, guibg = colors.base03 },
        },
      },
      window = { margin = { vertical = 0, horizontal = 1 } },
      hide = {
        cursorline = true,
      },
      render = function(props)
        local filename = vim.fn.fnamemodify(vim.api.nvim_buf_get_name(props.buf), ":t")
        if vim.bo[props.buf].modified then
          filename = "[+] " .. filename
        end

        local icon, color = require("nvim-web-devicons").get_icon_color(filename)
        return { { icon, guifg = color }, { " " }, { filename } }
      end,
    })
  end,
},
You've got floating elements on the right top of each pane like so:
It also tells you wihch pane is currently active with highlighted color. Neat.
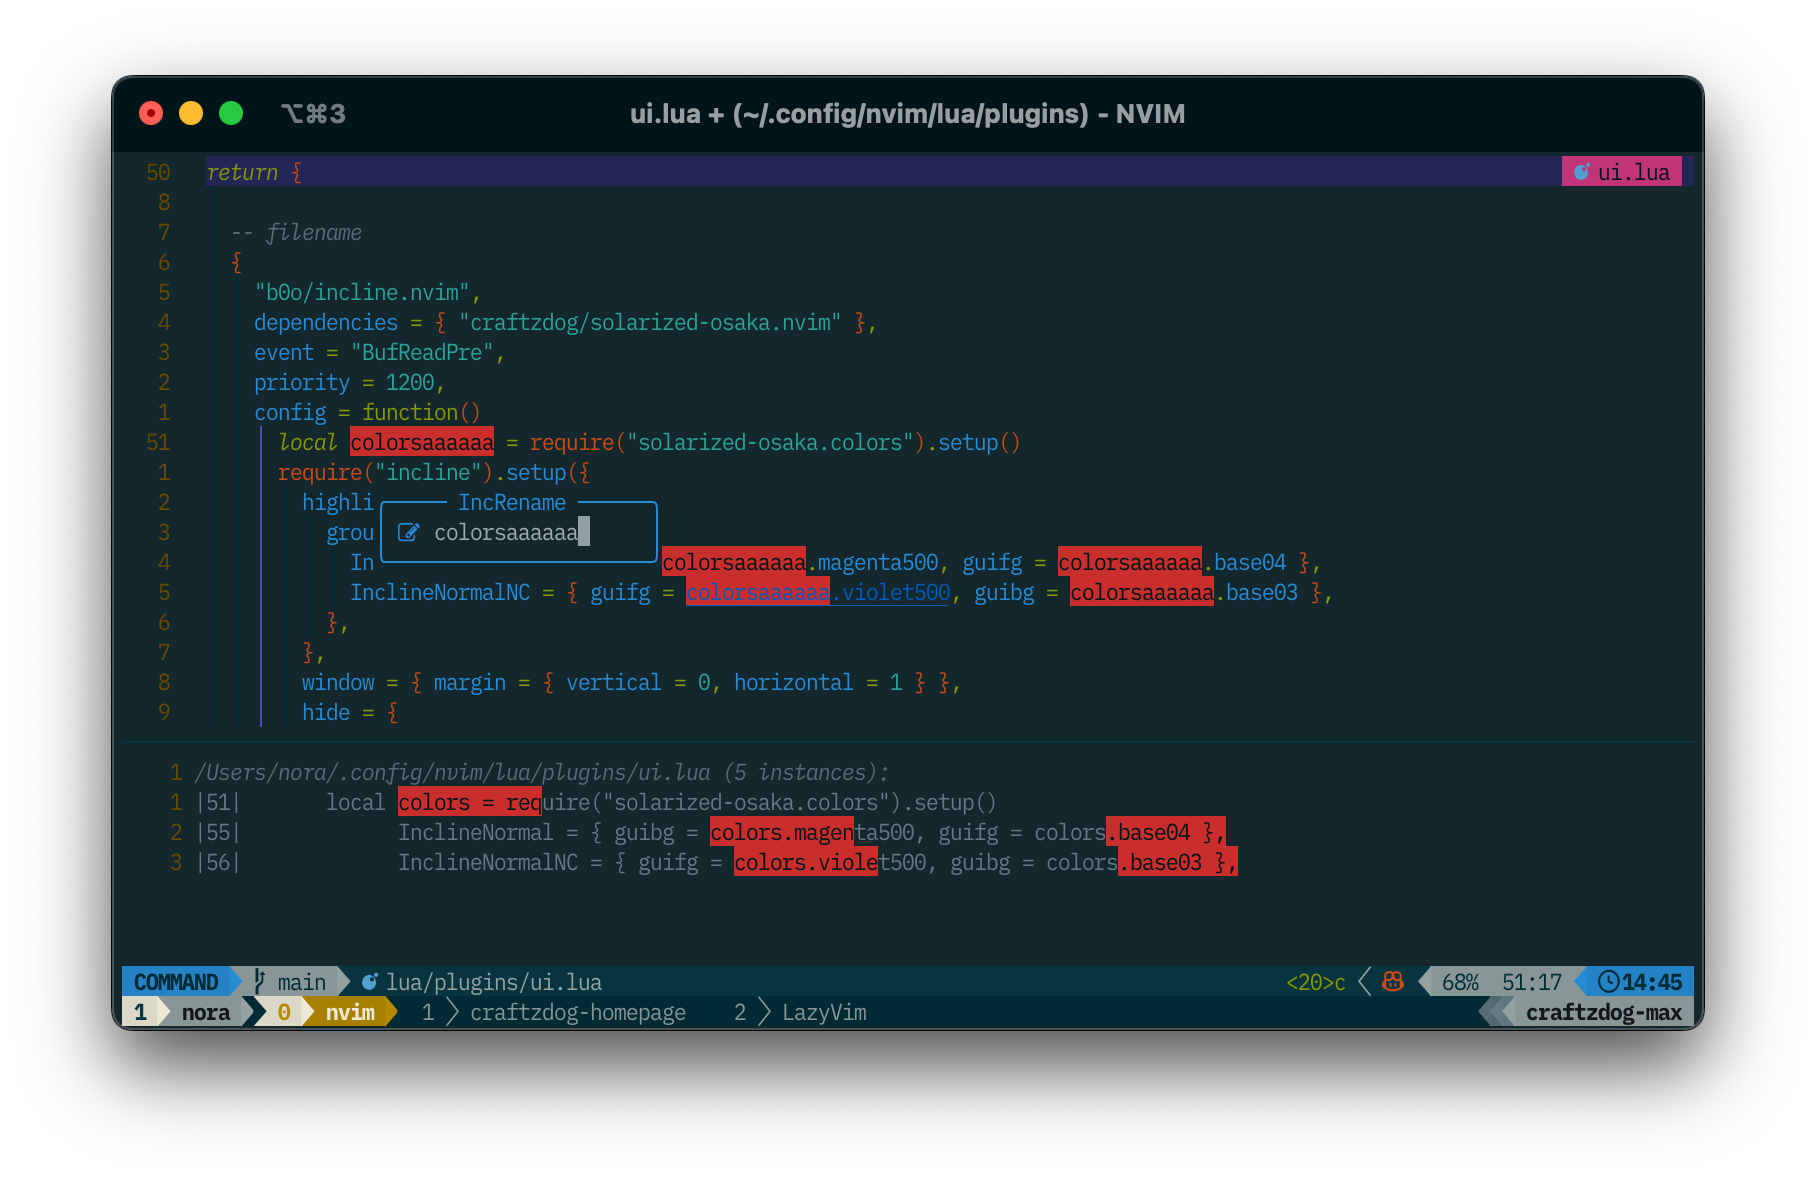
Incremental rename
It provides immediate visual feedback when renaming symbols by using Neovim's command preview feature.
Create lua/plugins/coding.lua:
-- Incremental rename
{
  "smjonas/inc-rename.nvim",
  cmd = "IncRename",
  config = true,
},
Press <leader>cr and rename something.
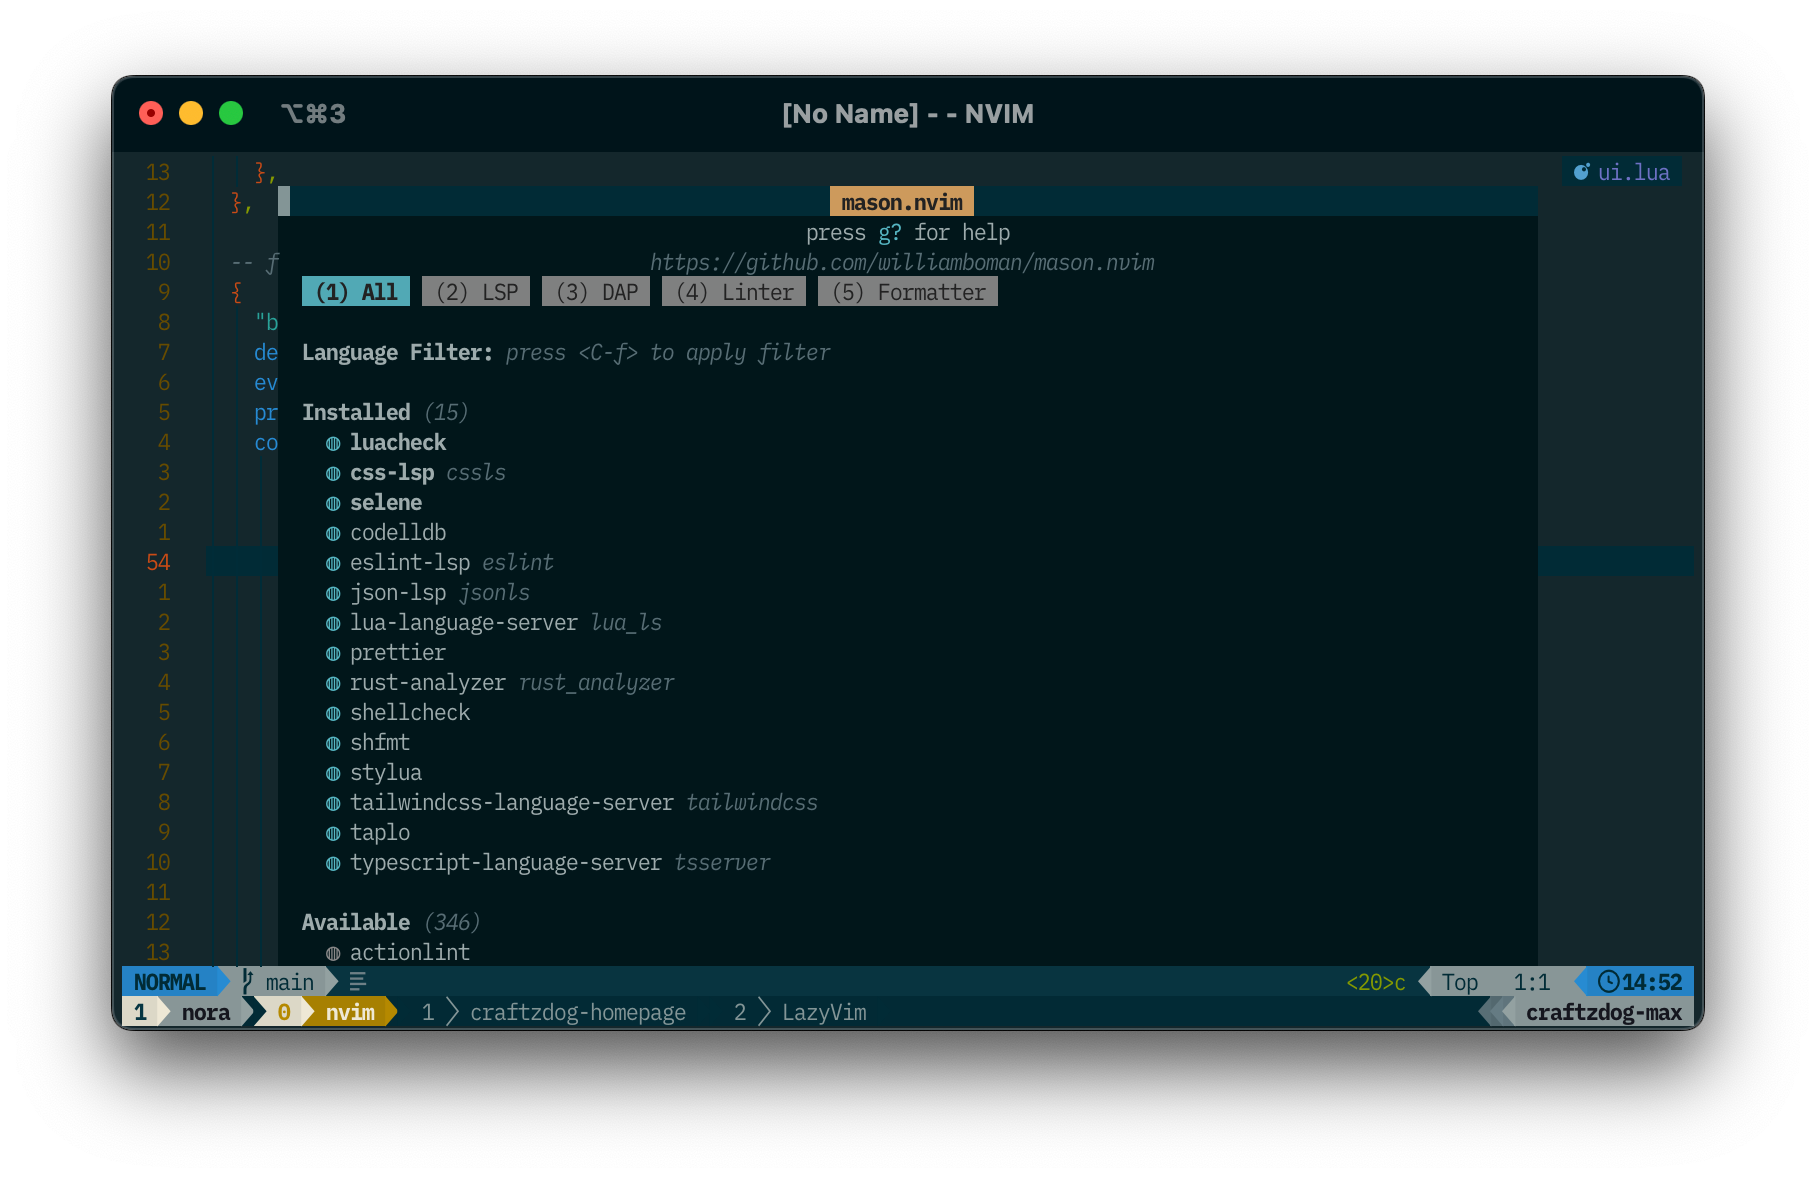
LSP
Add some lsp plugins to be automatically installed.
Create lua/plugins/lsp.lua:
return {
  -- tools
  {
    "williamboman/mason.nvim",
    opts = function(_, opts)
      vim.list_extend(opts.ensure_installed, {
        "stylua",
        "selene",
        "luacheck",
        "shellcheck",
        "shfmt",
        "tailwindcss-language-server",
        "typescript-language-server",
        "css-lsp",
      })
    end,
  },
}
Press <leader>cm to launch mason.nvim.
treesitter
There is not much things to configure treesitter with LazyVim.
I just specify some languages to be automatically installed on launch and let it tread msx files as Markdown.
return {
  {
    "nvim-treesitter/nvim-treesitter",
    opts = {
      ensure_installed = {
        "astro",
        "cmake",
        "cpp",
        "css",
        "fish",
        "gitignore",
        "go",
        "graphql",
        "http",
        "java",
        "php",
        "rust",
        "scss",
        "sql",
        "svelte",
      },
    },
    config = function(_, opts)
      require("nvim-treesitter.configs").setup(opts)

      -- MDX
      vim.filetype.add({
        extension = {
          mdx = "mdx",
        },
      })
      vim.treesitter.language.register("markdown", "mdx")
    end,
  },
}
That's it. You can see brackets (){}[] are automatically closed when inserting thanks to nvim-ts-autotag, which is enabled by default.
Also, nvim-treesitter-context shows code context like so:
Love it!
Disable some LazyVim plugins I don't use
I couldn't get used to flash.nvim 😂
In editor.lua:
{
  "folke/flash.nvim",
  enabled = false,
}
Animations
I found that LazyVim has an extra that enables animations using echasnovski/mini.animate - Mini Animate | LazyVim, wihch is cool.
But I sometimes feel scoll animations are annoying. So, instead of using the extra, I installed the plugin and disabled the scroll animation feature like so:
In ui.lua:
-- animations
{
  "echasnovski/mini.animate",
  event = "VeryLazy",
  opts = function(_, opts)
    opts.scroll = {
      enable = false,
    }
  end,
},
Suppress "No information available" messages
When editing JavaScript/TypeScript files and pressing K to show hoverdoc, you will notice you get "No information available" notifications, which are annoying:
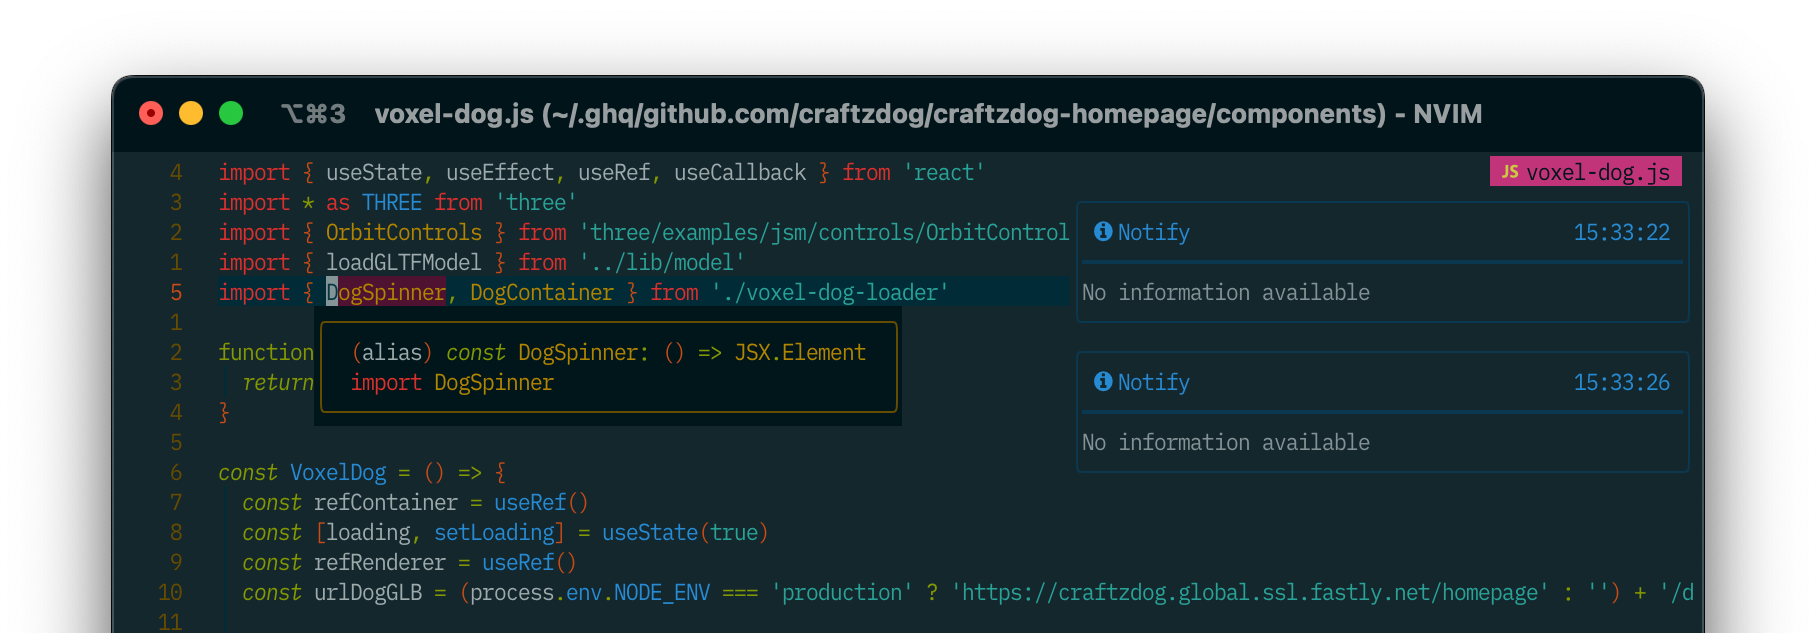
You can suppress them by adding the following configuration to noice.nvim:
return {
	-- messages, cmdline and the popupmenu
	{
		"folke/noice.nvim",
		opts = function(_, opts)
			table.insert(opts.routes, {
				filter = {
					event = "notify",
					find = "No information available",
				},
				opts = { skip = true },
			})
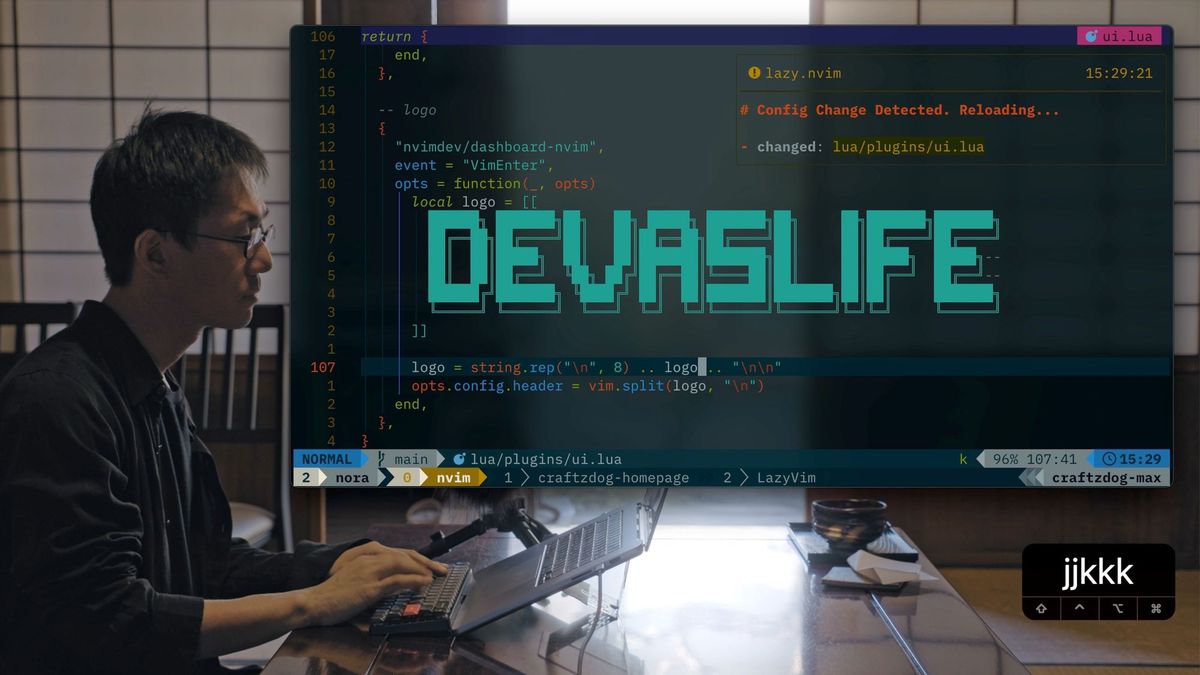
Create a startup logo
In ui.lua:
  {
    "nvimdev/dashboard-nvim",
    event = "VimEnter",
    opts = function(_, opts)
      local logo = [[
        ██████╗ ███████╗██╗   ██╗ █████╗ ███████╗██╗     ██╗███████╗███████╗
        ██╔══██╗██╔════╝██║   ██║██╔══██╗██╔════╝██║     ██║██╔════╝██╔════╝
        ██║  ██║█████╗  ██║   ██║███████║███████╗██║     ██║█████╗  █████╗
        ██║  ██║██╔══╝  ╚██╗ ██╔╝██╔══██║╚════██║██║     ██║██╔══╝  ██╔══╝
        ██████╔╝███████╗ ╚████╔╝ ██║  ██║███████║███████╗██║██║     ███████╗
        ╚═════╝ ╚══════╝  ╚═══╝  ╚═╝  ╚═╝╚══════╝╚══════╝╚═╝╚═╝     ╚══════╝

      ]]

      logo = string.rep("\n", 8) .. logo .. "\n\n"
      opts.config.header = vim.split(logo, "\n")
    end,
  },